If you’ve ever stood in your closet at 7am, shoved a pile of sweaters onto the floor to find a shoe, and thought “this room has more potential than this” — I’ve been there. My first walk-in was a converted spare bedroom in a 1990s house with one sad wire shelf and a bare bulb on a pull chain. It took me two failed attempts and one very expensive mistake (more on that below) before I landed on a system that actually holds up day to day. Here’s what I learned.
What Style Is This, and Who Is It For
The current walk-in closet look sits somewhere between boutique retail store and minimalist dressing room. Think open shelving that shows off folded knits like a display table, glass-front cabinets that protect but still show off, and lighting that makes you want to linger instead of grab-and-go.
This works for you if:
– You like seeing your clothes rather than digging through drawers
– You’ve got a spare room, oversized bedroom corner, or genuinely small closet you want to convert
– You’re willing to spend 30 minutes a month maintaining the “edited” look, because open storage only stays pretty if you keep it that way
It doesn’t work as well if you’re not naturally tidy and you know it. I’ll get into that under mistakes, because I made this exact miscalculation.
Time, Cost, and Space — What to Actually Expect
Timeline:
– A weekend refresh — new bins, a mirror, better lighting, thinner hangers — takes 1 to 3 days
– A modular system install runs a few days to a week
– Custom built-ins with electrical and carpentry work can take 1 to 3+ weeks, especially if you’re waiting on cabinetry fabrication
Cost, realistically:
– $200–$1,500 for a budget refresh: freestanding organizers, matching bins, a full-length mirror, a plug-in sconce or LED strip
– $500–$3,000+ for a modular system (think IKEA PAX or Elfa) sized to your closet, plus drawers and accessories
– $5,000–$20,000+ for custom built-ins, an island, glass fronts, and designer lighting
I want to flag something here: the jump from modular to custom isn’t just about materials. It’s electrical work, permits in some cases, and finish carpentry — that’s where the price triples, not the shelving itself.
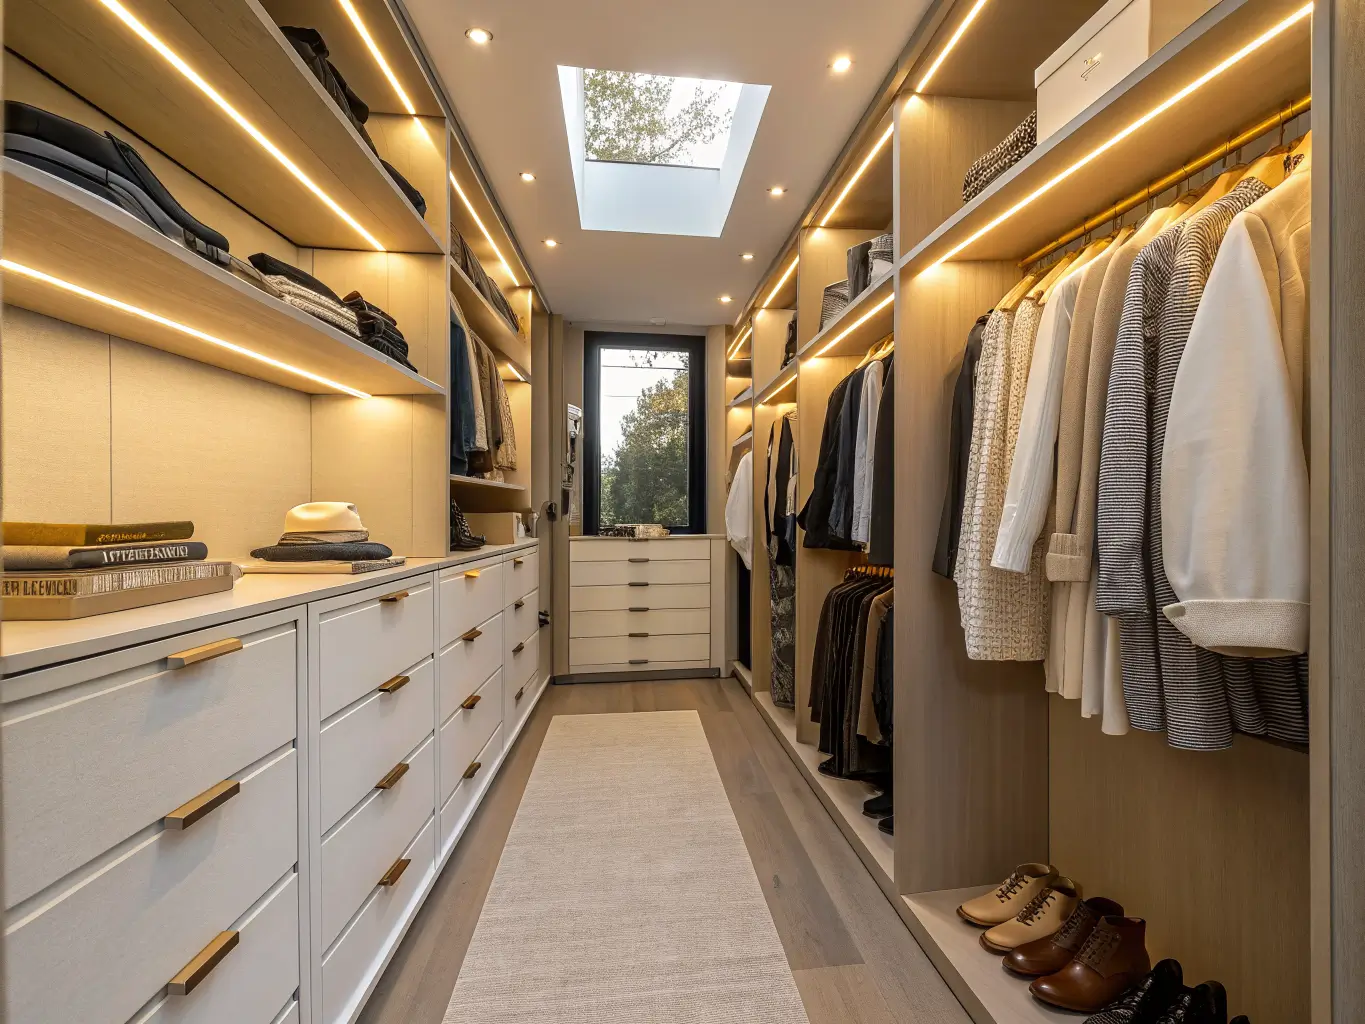
Space: A 4 ft x 4 ft closet can still function as a walk-in with a single-wall or corner layout. Anything narrower than about 6 feet wide should go galley-style (storage on both sides, walkway down the middle) rather than trying to force a U-shape.
Skill level: Swapping hangers, adding a mirror, hanging a pendant on an existing junction box — beginner territory. Moving walls, adding new electrical, building an island — call a contractor unless you’ve done cabinetry before.
The Non-Negotiables: What Every Walk-In Closet Needs
Skip the pretty stuff for a second. These are the bones.
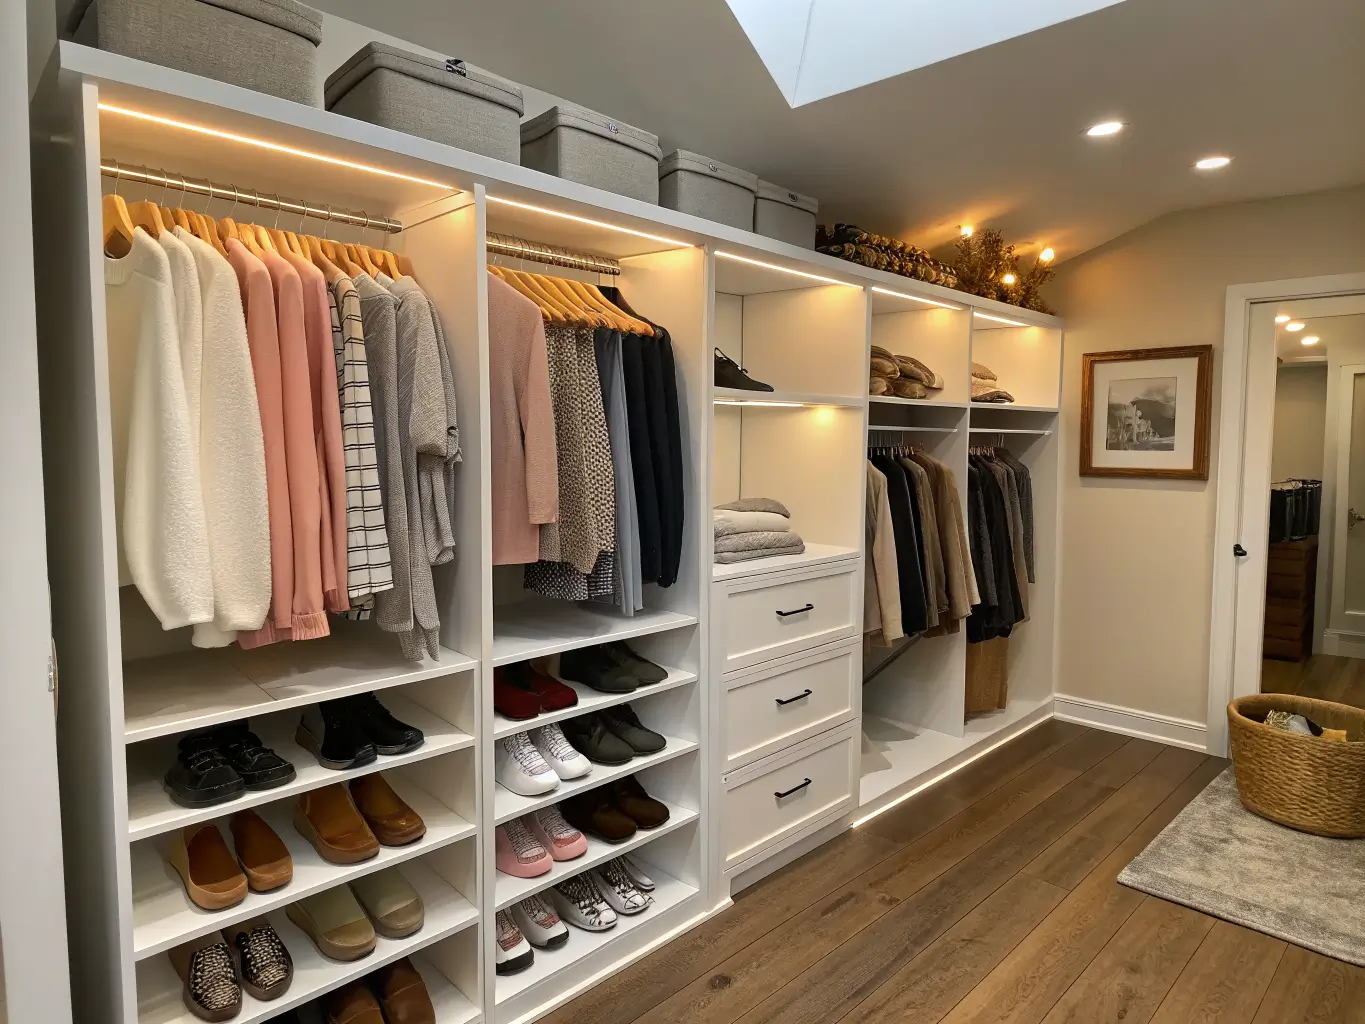
– A closet system with adjustable rails and shelving. Fixed shelves are the reason most builder-grade closets waste 30% of their space. Adjustable means you can change it as your wardrobe changes.
– Double hanging rods. Stack two rods for shirts, folded pants, and shorter items, and you roughly double your hanging capacity in the same wall space.
– Dedicated shoe storage. Slanted shelves, cubbies, or a vertical shoe rack — anything but a pile on the floor. This is the single biggest visual difference between a closet that looks “done” and one that doesn’t.
– Drawers with dividers. For jewelry, underwear, scarves, belts. Everything that shouldn’t be folded on an open shelf where it’ll slide and look messy within a week.
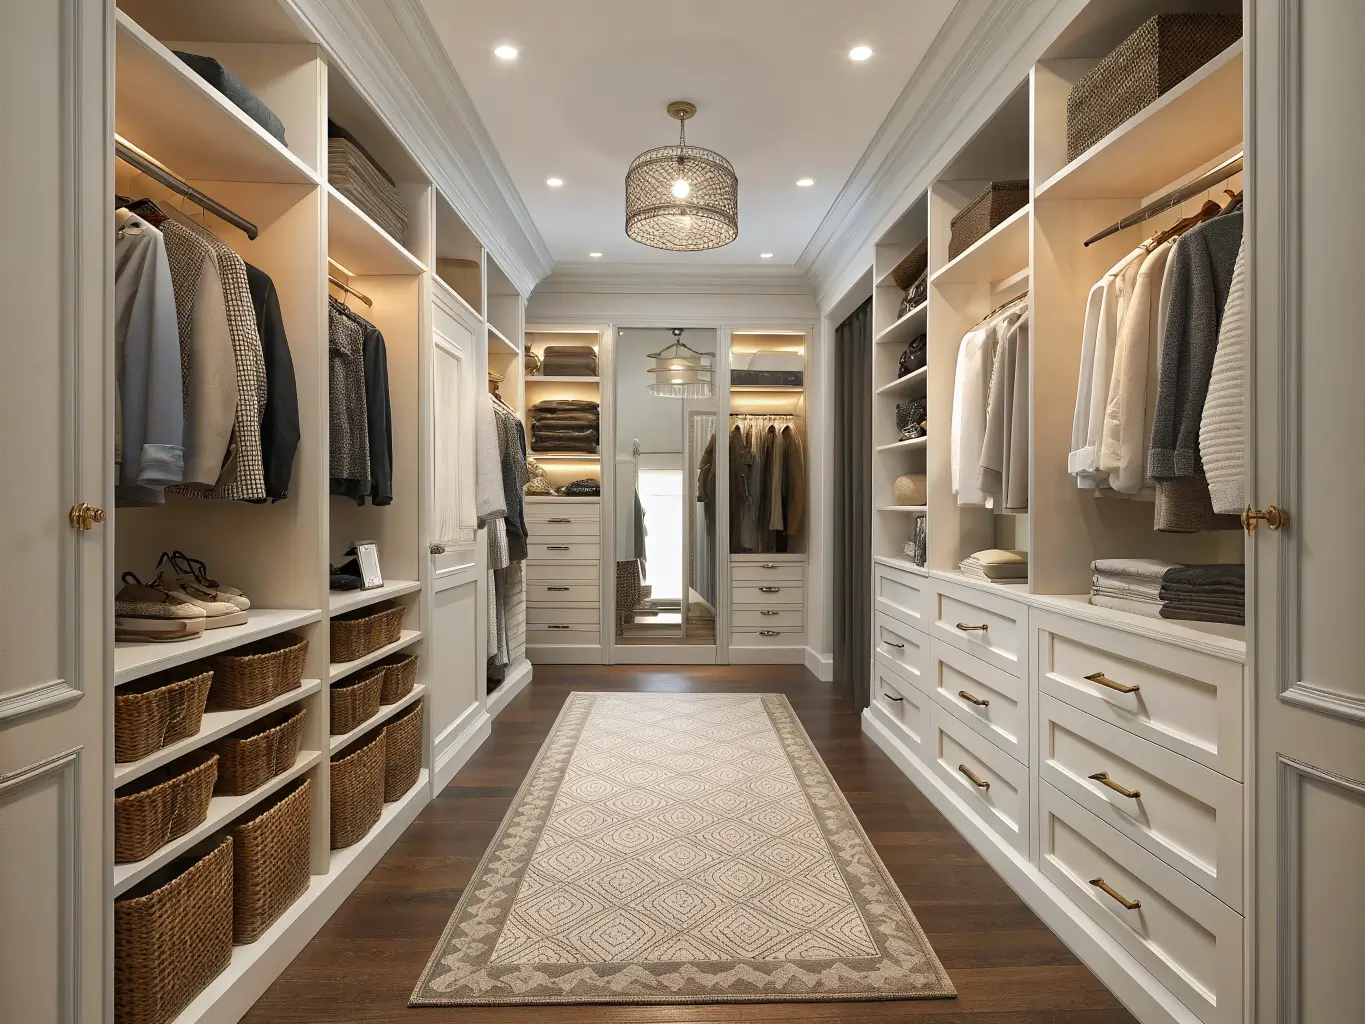
– A mirror — full-length, minimum. I put mine at the end of my galley closet, facing the entry, and it makes the whole 6×10 room read almost twice as deep.
– Layered lighting. One overhead fixture isn’t enough. Aim for at least five light sources if you can — a ceiling fixture, LED strips under shelves, a plug-in sconce near the mirror. You need to be able to tell navy from black at 7am.
– A bench or stool. Even a small upholstered one. Putting on shoes standing up in a closet is how you knock a shelf of folded sweaters onto the floor. Ask me how I know.
– Matching bins and baskets. For off-season items and anything you don’t need to see daily.
– A valet rod. A single pull-out rod near the mirror for staging tomorrow’s outfit. Cheap to add, genuinely useful.
Nice-to-Haves If You Have the Space or Budget
Once the essentials are handled, this is where a closet starts to feel like a room instead of storage.
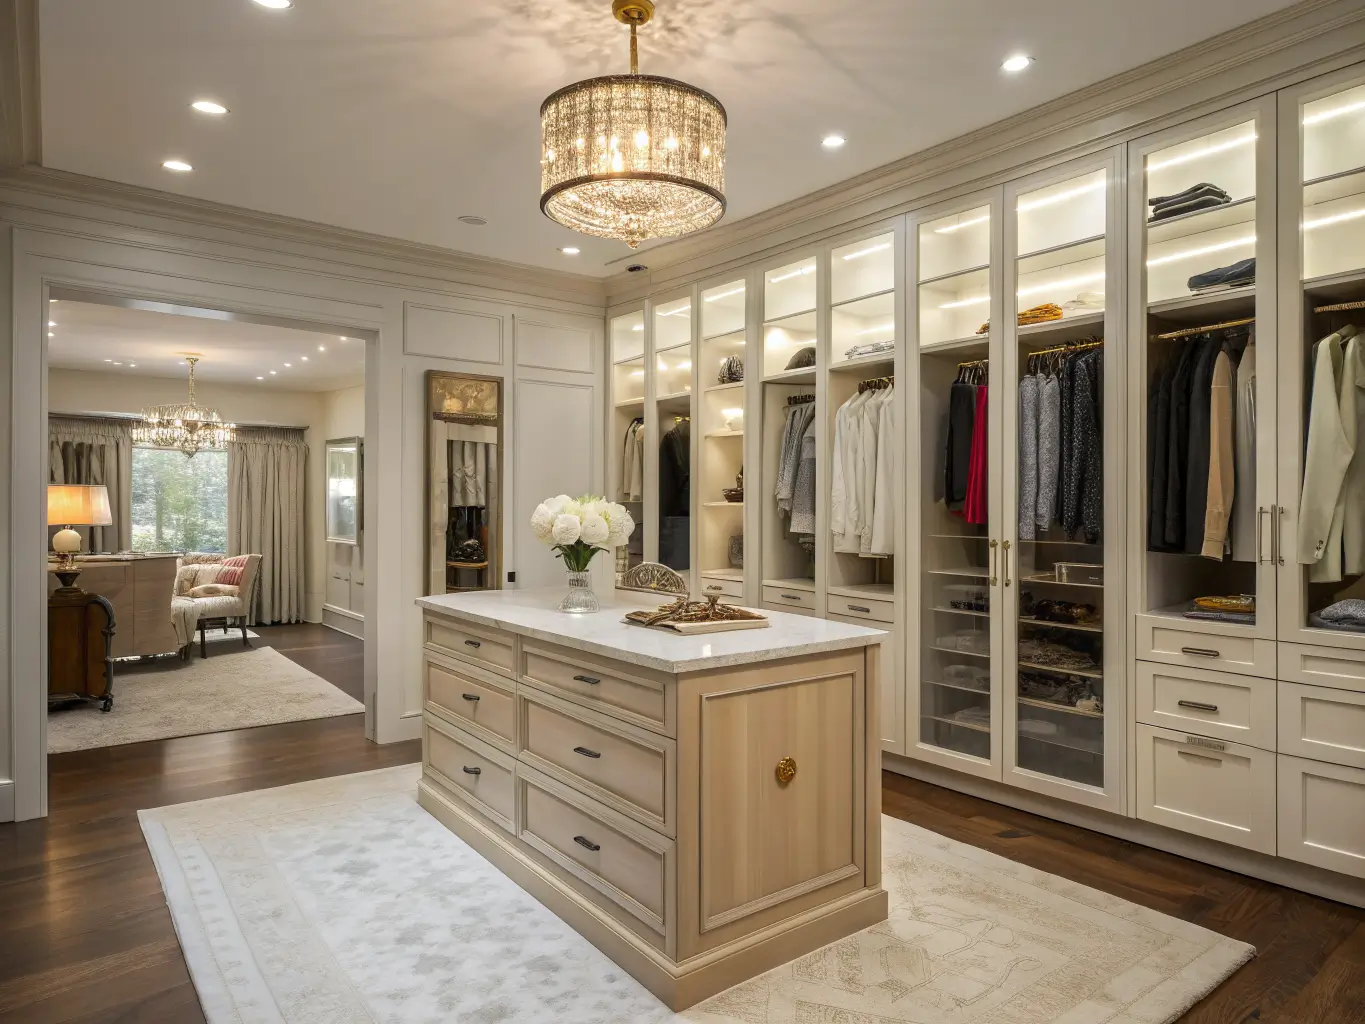
– A center island. Only makes sense in larger walk-ins — you need at least 42 inches of clearance on each side to walk around it comfortably. Great for folded items and a flat surface to lay out an outfit.
– Glass-front cabinetry. Keeps dust off delicate pieces while still looking curated. More expensive than open shelving, less upkeep.
– A statement chandelier or pendant. Even in a small closet, a $150 flush-mount fixture with some personality does more for the “luxury” feel than almost anything else on this list.
– Wallpaper on the back wall or ceiling. I used a peel-and-stick botanical print on the back wall of my galley closet — it’s the first thing you see in the mirror, and it cost me $40 and an afternoon.
– A rug. Hard flooring in a closet feels stark and cold underfoot. A 3×5 runner softens it instantly.
– An accent chair or pouf, if your square footage allows it.
– Pull-out jewelry trays. Small detail, big daily payoff — no more untangling necklaces.
How to Lay It Out and Style It
Prep before you buy anything
Declutter first. I know this is the advice nobody wants, but buying a beautiful system for clothes you don’t wear is how you end up with a boutique-looking closet that’s still hard to use. Sort by category — tops, bottoms, dresses, shoes, accessories — before you measure for storage.
Measure everything, including door swing, window placement, and clearance if you want a bench or island. I skipped measuring door swing once and ended up with a dresser I couldn’t fully open. Learn from that.
Pick your layout based on shape, not Pinterest:
– Single-wall for small or awkward spaces
– Corner layout when you’re working around a window or door
– Galley (storage on both sides) for narrow, rectangular rooms — this is what I have
– U-shaped if you’ve got the width for it and want maximum storage
– Open dressing-room layout for bigger rooms where you want an island or seating
Build it in order
Start with the big functional pieces — the shelving system, rods, drawers. Get the bones locked in before you add a single decorative thing. Then layer in the mirror, lighting, bench, and decor.
Use your top shelf for bins (off-season, sentimental items, stuff you grab twice a year) and keep the prime real estate — eye level and below — for what you wear weekly. Go floor-to-ceiling if your walls allow it; wasted vertical space above 6 feet is one of the most common closet design misses.
Create one focal point. For me it’s the mirror wall with the wallpaper behind it. For you it might be a chandelier, a glass cabinet section, or an open wall dedicated to bags and shoes like a little in-home boutique.
Style by color and category. This is the single easiest way to make a closet look expensive without spending money. Group your whites, then your blacks, then color. It reads intentional even if the closet itself is basic wire shelving.
Where I’d Spend and Where I’d Save
Spend on:
– Lighting — it affects how you use the closet every single day
– A real mirror, not a cheap one that warps the reflection
– Matching hangers (see below — this one’s worth it)
Save on:
– Bins and baskets — you don’t need designer storage boxes; a coordinated set from a home goods store does the same job for a third of the price
– The island, if your space is tight — a nice dresser in the middle does 80% of the job for 20% of the cost
– Custom cabinetry, if a modular system (PAX, Elfa, even a well-planned Container Store Elfa build) fits your space. Custom is beautiful but it’s often paying for exact-fit millwork you don’t strictly need in a standard-shaped room.
The Mistake I Made (So You Don’t Have To)
I went all-in on open shelving because it looked incredible in photos. No drawers, no closed cabinets, just shelf after shelf of folded clothes and displayed bags. It looked like a boutique for exactly nine days. Then life happened, and it looked like a laundry pile with good lighting.
The fix: mix open and closed storage. Open shelving for the things you’re actually disciplined about — folded jeans, a curated shoe display. Closed drawers or bins for everything else — the stuff that wrinkles, the off-season pieces, the things you don’t want visible on a Tuesday when you’re running late. This single change is what took my closet from “pretty for a week” to “still looks good two years later.”
Other Common Mistakes
– Buying storage before measuring or sorting your wardrobe. You’ll either over-buy or end up with gaps that don’t fit anything.
– Bulky hangers. Swapping to slim velvet hangers gave me back roughly 20% more hanging space — same rod, same closet, more room. It’s the cheapest upgrade on this whole list at about $20–30 for a set of 50.
– No dedicated shoe zone. Shoes end up in piles on the floor, which undoes the whole “curated” look fast.
– A single light source. You cannot color-match a navy sweater and black pants under one dim overhead bulb. I learned this the hard way wearing mismatched “black” pants to work more than once.
– Skipping the mirror. Even in a tiny closet, it makes the room feel bigger and saves you a trip to the bathroom mirror every morning.
Keeping It Looking Good Long-Term
Pick one visual language and stick to it. Clean-modern, boutique-luxe, or soft-and-warm — pick one. A closet with black metal shelving next to a shabby-chic floral bin next to a bright acrylic organizer looks like three people decorated it.
Limit your containers to one matching set. It’s a small thing that makes a massive visual difference — the storage reads as design instead of clutter.
Leave some negative space on shelves. A shelf packed edge to edge, even if it’s tidy, reads as full and busy. Leaving a few inches of breathing room on each shelf is what makes boutique displays look boutique instead of stocked.
Rotate with the seasons. Move off-season clothing into bins or under-bed storage twice a year. This alone keeps a small closet functional no matter how big your wardrobe actually is.
Budget refresh order, if you’re doing this in stages: thinner hangers first (cheapest, biggest immediate impact), then a mirror, then a rug, then peel-and-stick wallpaper, then a plug-in light fixture. Save built-ins for last, once you know exactly how you use the space.
If your space is genuinely tight, skip built-ins altogether and use freestanding units instead. You get 80% of the walk-in effect for a fraction of the cost, and you can take it with you if you move — which, in my case, I did, wire shelf and all.
New mom embracing the chaos and creativity! 💕 Sharing budget-friendly tips for cooking, DIY hacks, home decor, fashion, and making every moment stylish and affordable