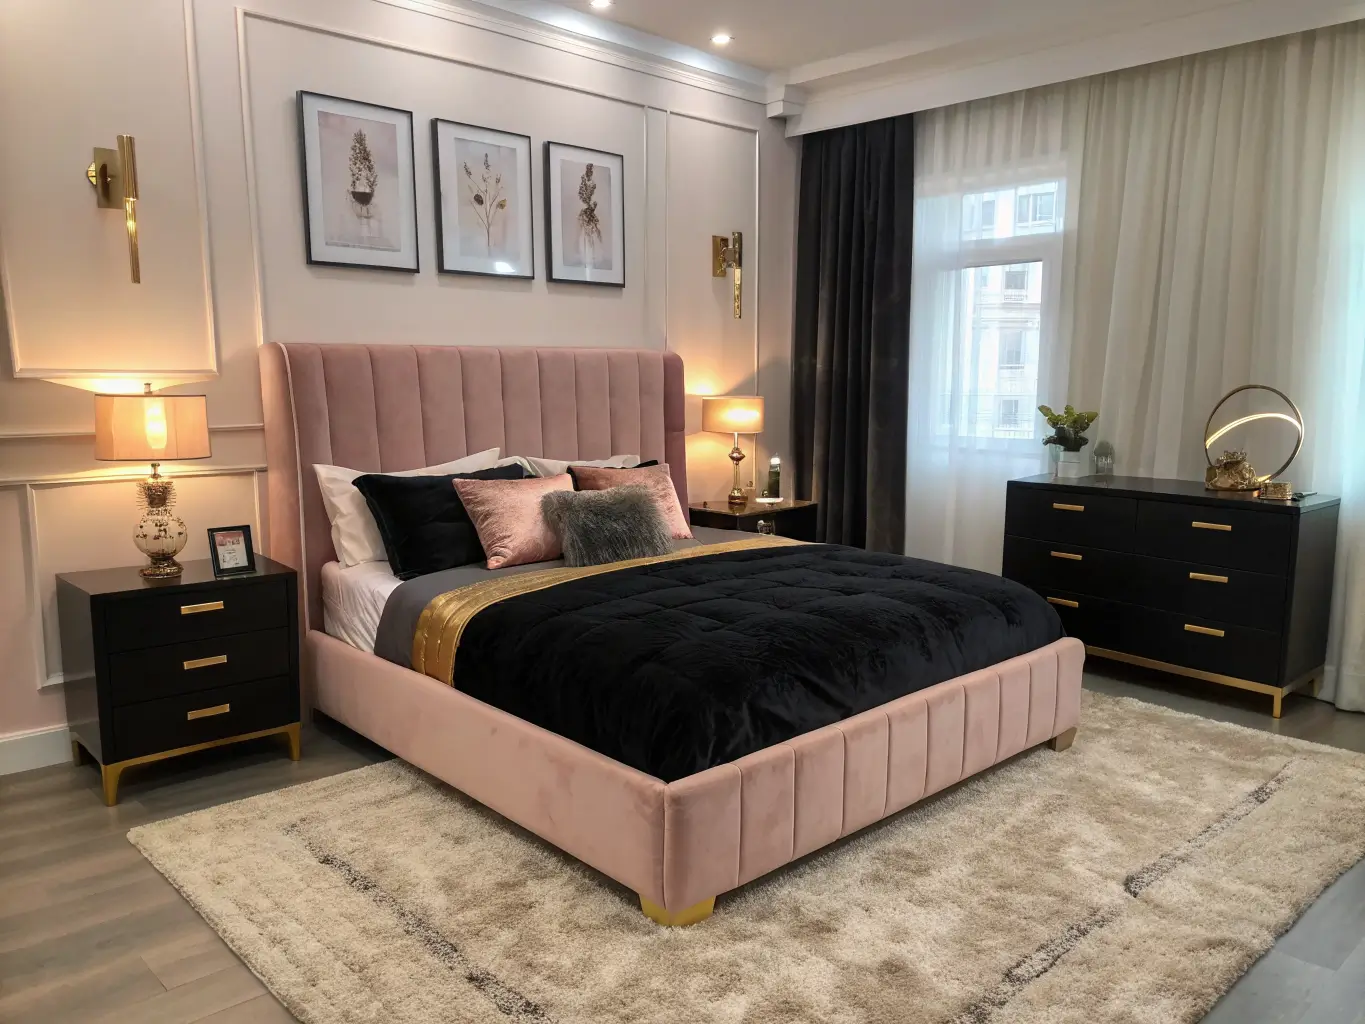
It’s not one specific color or product. It’s the combination of confidence and control — bold choices, but curated ones. Think velvet or satin bedding, a big mirror that catches every bit of light in the room, LED strips that shift color depending on your mood, and a wall of images that’s clearly yours — not stock photography.
Who this is for: if you like beauty products displayed like decor, fashion references on your walls, and a room that photographs as well as it lives in, this style was made for you.
Where it works: small bedrooms, dorm rooms, studio sleeping nooks, standard primary bedrooms. It doesn’t need square footage — it needs a plan. In fact, I think it works better in small rooms, because you’re not trying to fill space with furniture. You’re filling it with light and color, which costs less and takes up zero floor space.
Time, Cost, and Skill Level — What to Actually Expect
I’ll be honest: my first pass took a weekend. My second, “actually good” version took closer to ten days, spread out over a month, because I kept waiting for a mirror I wanted to go on sale.
– Basic refresh: 1–3 days. New bedding, LED strip, a few prints taped up.
– Full makeover: 1–2 weeks, done in stages — paint first, then furniture, then lighting, then the art wall last.
– Budget: $150–$500 gets you LED strips, a thrifted mirror, and new textiles. $500–$1,500 covers a real headboard, quality bedding, a statement mirror, and layered lighting. $1,500+ moves into upgraded furniture and custom-feeling accents.
– Skill level: beginner to intermediate. Bedding, lighting, and wall art are beginner-friendly. An accent wall or a wired-in LED install with a dimmer switch is intermediate — budget an afternoon and a friend who’s handy with a drill.
It’s a year-round style, too. Nothing about it depends on a season, which is part of why it doesn’t feel dated after three months the way holiday-specific decor does.
The Core Palette and Materials
Pick your lane before you buy anything. The most common baddie palettes are:
– Pink and black — hot pink or blush against black furniture and frames
– Dark feminine — burgundy, plum, charcoal, deep jewel tones
– Soft glam — champagne, beige, white, gold, barely-there color
– Purple and silver — moodier, a little more nightlife than daytime
Whatever you pick, cap it at 2–3 main colors plus one metallic. I learned this the hard way — my first version had pink, purple, gold, silver, AND black in the same sightline, and it looked like a teenager’s Claire’s exploded rather than a styled room. When I cut it down to blush, black, and gold, the exact same furniture suddenly looked intentional.
Materials do a lot of the “glam” heavy lifting: velvet, satin, faux fur, mirrored surfaces, glossy furniture finishes, and anything metallic. Flat cotton bedding and matte everything is what makes a baddie room look flat instead of luxe — texture is not optional here.
The Must-Have Pieces
The bed setup. This is your anchor. Velvet or satin bedding in black, blush, plum, or a high-contrast black-and-white combo. Layer pillows — don’t just throw two shams on and call it done. I run a minimum of five pillows on a queen bed: two standard shams, two decorative accent pillows in a contrasting texture, and one lumbar pillow in the metallic accent color.
Lighting — plural, not singular. This is where most people either nail the look or completely miss it.
– LED strip lights behind the headboard or along a shelf, color-changing if you can swing it
– A neon sign (a word, a shape, your name) as a focal point
– A dimmable table lamp on each nightstand, warm bulb, never cool white
– A small chandelier or wall sconces if your budget allows
A statement mirror. Oversized, arched or ornately framed, ideally leaning against the wall or hung low enough to reflect the bed. This single piece will do more for how “finished” your room looks than almost anything else on this list. I found mine — a 5-foot arched mirror with a thin gold frame — at a Facebook Marketplace listing for $40 because someone was moving and didn’t want to ship it. That mirror is the first thing anyone comments on when they walk in.
Wall art with personality. Gallery walls, collages, oversized prints, actual Polaroids of you and your friends, concert posters. This is not the place for generic “Live Laugh Love” prints — the whole point is that it looks like nobody else’s room.
Texture layers. Faux fur rug at the foot of the bed, a throw blanket in a contrasting texture, satin pillowcases (your hair will also thank you for this one), glossy or mirrored trays on your dresser.
Supporting furniture. Black or white nightstands, a small vanity if you have the corner for it, a glossy dresser. These pieces should support the palette, not compete with the bed and mirror for attention.
Optional Upgrades Worth Considering
Once the essentials are in place, these push the room from “good” to “this is exactly what I wanted”:
– Metallic accessories — gold lamp bases, silver picture frames, a rose-gold jewelry tray
– An accent wall behind the bed, either a dark paint color or a bold wallpaper — this gives your eye somewhere to land and makes the whole room feel designed rather than assembled
– Animal print in small doses — a leopard throw pillow or zebra-print bench, not a whole rug and curtain set
– Crystals and glass decor for extra shine without extra cost
– Personal objects on display — perfume bottles lined up on a tray, jewelry on a stand, beauty products arranged rather than shoved in a drawer
How to Layer It So It Doesn’t Look Cluttered
There’s an order that works, and skipping steps is usually why a room ends up feeling busy instead of rich:
1. Base bedding — your main color and fabric
2. Throw blanket — a different texture than the bedding
3. Accent pillows — pattern or color pop
4. Rug — grounds the room, usually faux fur
5. Reflective decor — mirror, trays, glass — added last because it should highlight what’s already there, not compete with it
Make the bed wall the whole point. Everything else — mirror placement, lighting, art — should be arranged to draw the eye back to that wall. If you’re standing in the doorway and your attention goes to the closet or a random shelf first, something’s off.
And please, turn off the overhead light before you decide the room is “done.” Baddie rooms are lit like a night out, not an operating room. Warm lamps, LED color, maybe candles — overhead lighting alone flattens every good decision you just made.
Setting It Up: A Realistic Order of Operations
Before you buy anything:
– Clear the room of clutter. This style reads as intentional, and intentional doesn’t happen around a pile of laundry.
– Pick your palette on paper first. I cannot stress this enough — I bought a purple lamp before I’d settled on pink-and-black, and it sat in a closet for eight months before I finally returned it.
– Decide your biggest anchor piece — bed, headboard, or mirror — and buy that first. Everything else gets chosen to match it.
Building it:
1. Bedding first. This sets your fabric and color direction for everything else.
2. One major light source — the neon sign or LED strip — then fill in with softer lamps.
3. Mirror and reflective surfaces next, positioned to bounce your new lighting around the room.
4. Personal decor last: the collage wall, the beauty tray, the jewelry stand.
Test your lighting at night before you commit to final placement. I moved my LED strip three times because it looked fine at 2pm and completely different at 10pm, which is really the only time that matters for this style.
Mistakes That Make a Baddie Room Look Cheap Instead of Glam
– Too many colors fighting each other. If you can’t name your palette in five words, it’s too many colors.
– Overhead light as your only light source. Flat and harsh, every time.
– Decorating every single surface. A few statement pieces beat ten small ones. My biggest early mistake was covering my dresser in so many trinkets you couldn’t tell what was decor and what was clutter.
– Skipping texture. Plain cotton sheets and a bare wood nightstand next to a neon sign just looks unfinished, not edgy.
– No system for storage. Beauty products are part of the aesthetic when displayed on a tray. Scattered across the counter, they’re just mess.
Keeping the Room Feeling Fresh, Not Static
Stick to your original 2–3 colors when you add anything new — new pillow, new print, new candle, whatever. This is the fastest way to keep a room looking pulled-together a year in instead of like it’s been added to randomly.
Edit occasionally. Every few months, I pull one thing off my shelf that’s stopped earning its spot. The room stays sharp instead of accumulating stuff the way rooms tend to.
For budget refreshes, prioritize in this order: LED strips, pillow covers, a thrifted mirror, then a faux fur throw. Skip replacing furniture unless something is actually broken — a $600 dresser swap does less for the room’s look than a $15 mirror in the right spot.
Seasonal tweaks are simple: swap pillow covers and a couple of art prints for new colors, switch your lamp bulbs to a warmer tone if you want a cozier winter feel, add a new neon phrase if you’re bored. None of this touches your actual furniture or bones of the room.
If you want variety without starting over, look at soft glam (more neutral, less neon), dark feminine (deeper jewel tones, moodier lighting), or minimal baddie (same bones, way fewer objects on display). All of them use the same formula — color, lighting, texture, personal touches — just dialed to different volumes.
New mom embracing the chaos and creativity! 💕 Sharing budget-friendly tips for cooking, DIY hacks, home decor, fashion, and making every moment stylish and affordable