A pixie shag haircut keeps the sides short and leaves four inches on top, point cut on dry hair so the pieces pull apart instead of sitting flat. Most mornings it’s a rough-dry with your hands and a pea-size bit of texture paste, done in under five minutes. Plan on a trim every five weeks to keep the shape.
1. Long Choppy-Top Pixie Shag Haircut
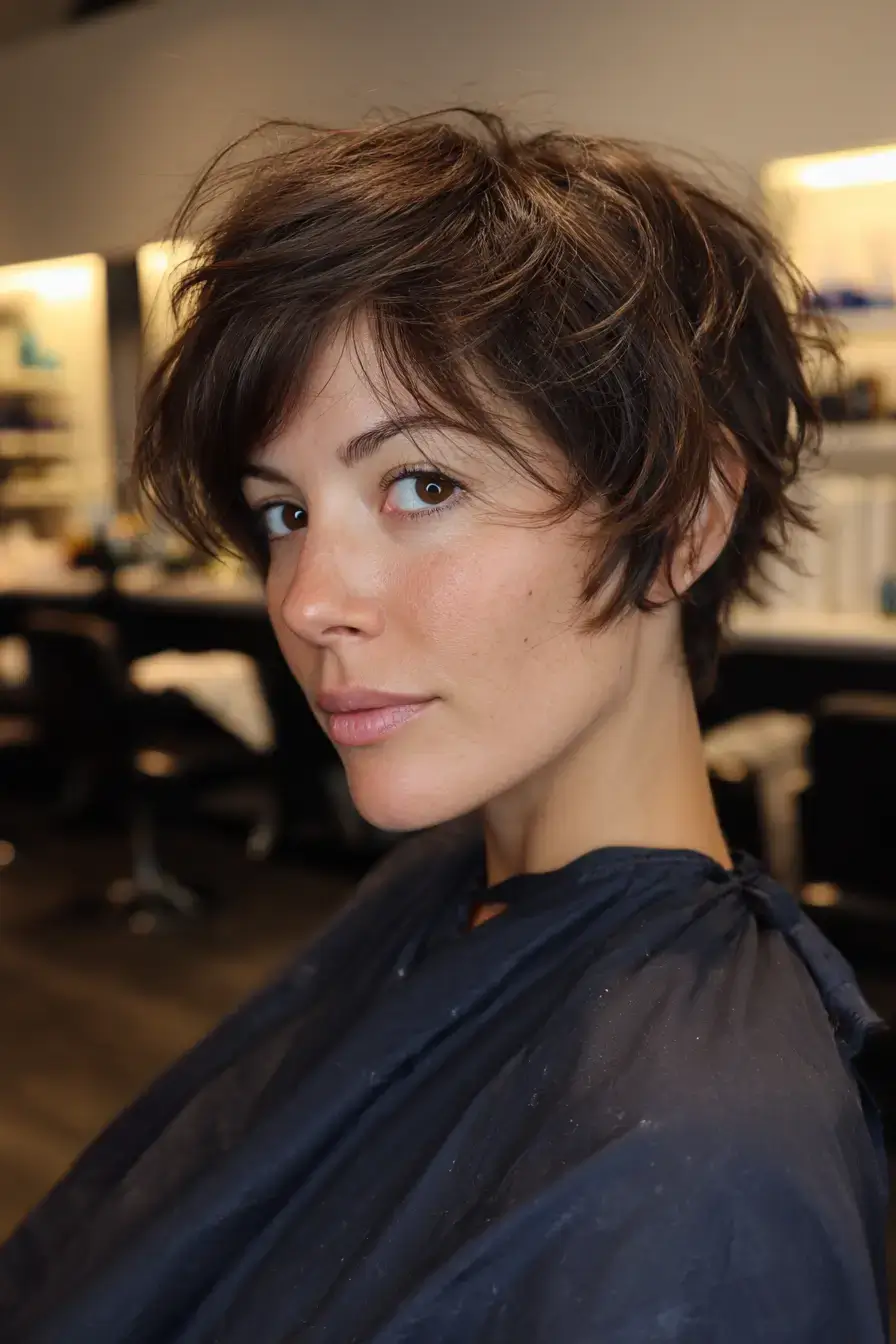
My most-cut pixie shag haircut keeps the sides short and the top at four inches, point cut deep so the pieces pull apart. On dry hair I take the sides and nape with scissor over comb, then point cut an inch into each section on top. Fine to medium density and 1A to 2B texture on oval and heart faces suit it. Rough-dry with a texture paste, pushing the top forward and apart. Trim every five weeks.
2. Curtain-Bang Pixie Shag
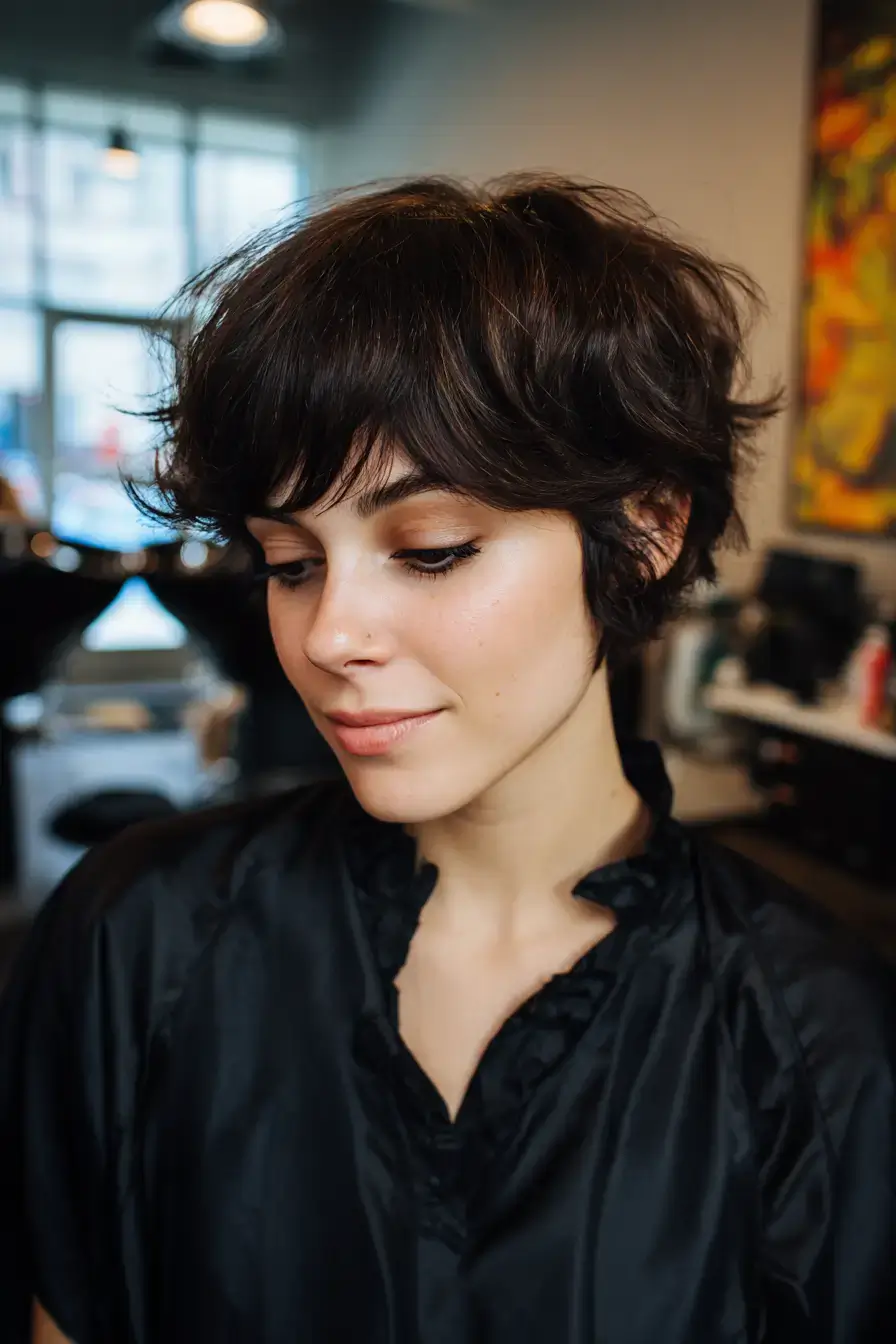
On a pixie shag, I cut curtain bangs to the cheekbone and point cut them so they open at the center. On dry hair the sides go to two inches and the top is point cut to four inches, then I section a triangle and cut the bangs from the brow to the cheekbone. Fine to medium density and 1A to 2B texture on round and square faces suit it. Use a small round brush to blow-dry the bangs out. Trim every five weeks.
3. Fine Hair Pixie Shag
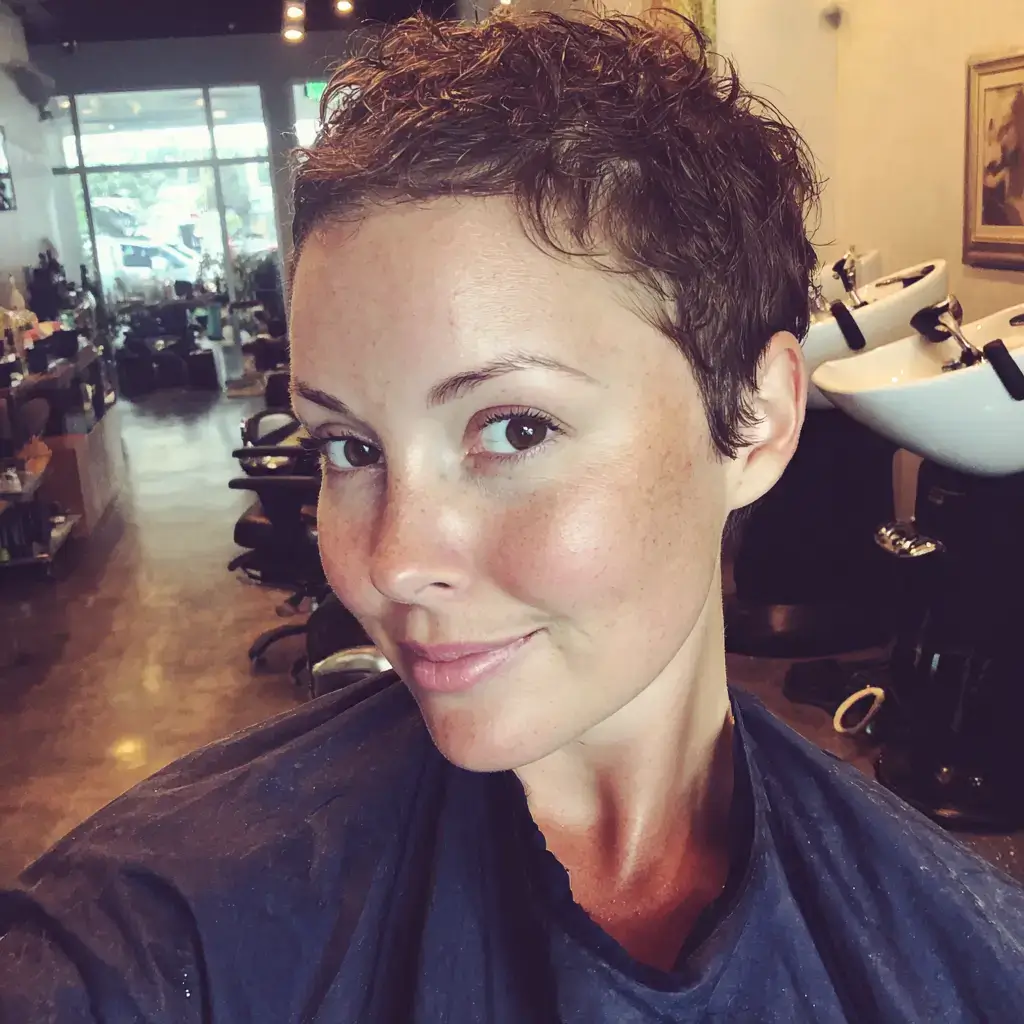
For fine hair, a pixie shag keeps the top at three inches with light point cutting, so the pieces separate without looking thin. On dry hair I cut the sides with scissor over comb, point cut the top to three inches, and texturize only the ends. Fine density and 1A to 2A texture on oval and oblong faces suit it. Put mousse on damp roots, rough-dry, and finish with a light paste. Trim every five weeks.
4. Soft-Sideburn Pixie Shag Haircut
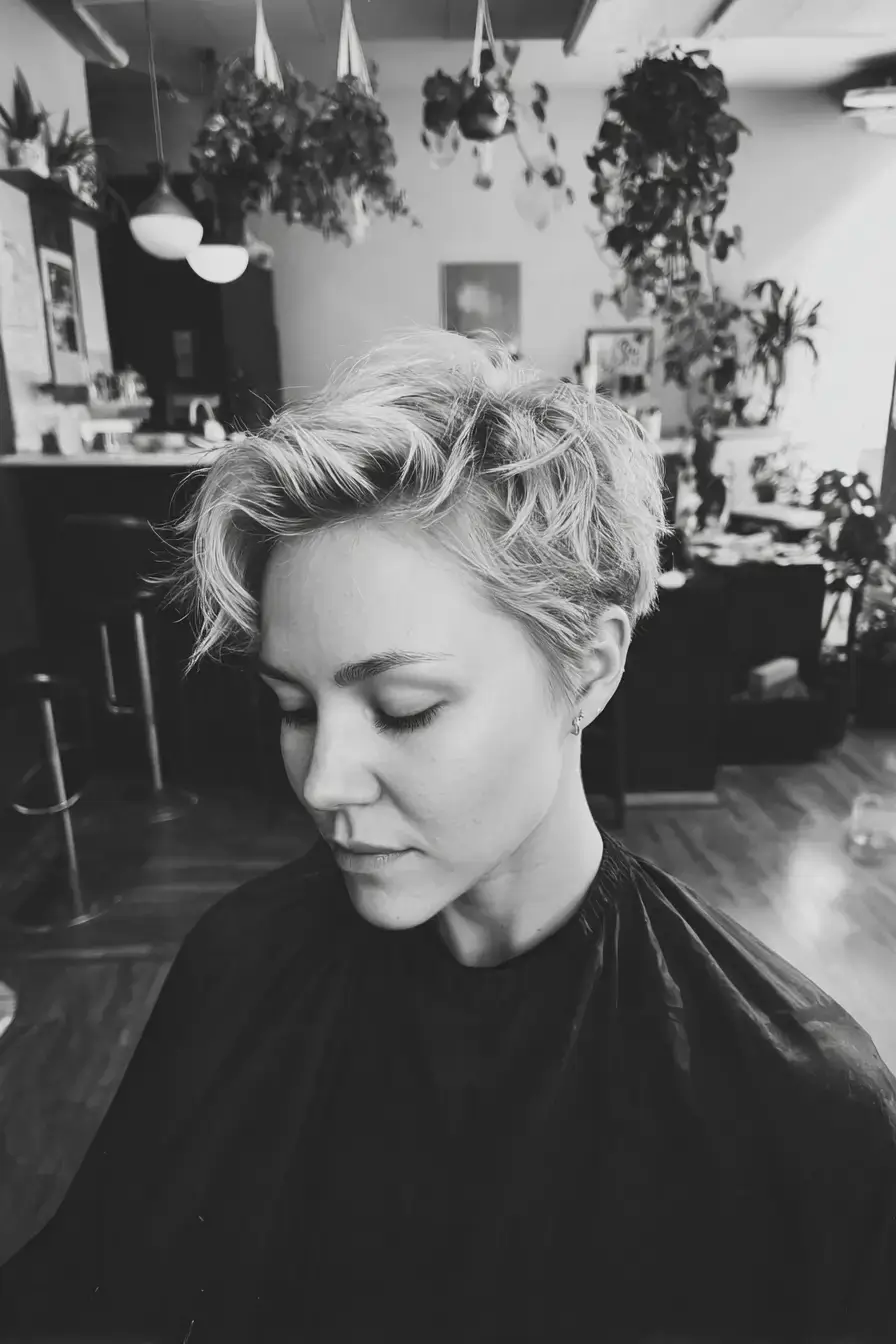
On a pixie shag haircut, soft sideburns are two wispy pieces left in front of each ear while the sides stay short. On dry hair I take the sides to two inches, leave a thin piece in front of each ear down to the earlobe, then point cut the top to four inches. Fine to medium density and 1A to 2A texture on oval and heart faces suit it. Rough-dry using a texture paste. Trim every five weeks.
5. Thick Hair Pixie Shag
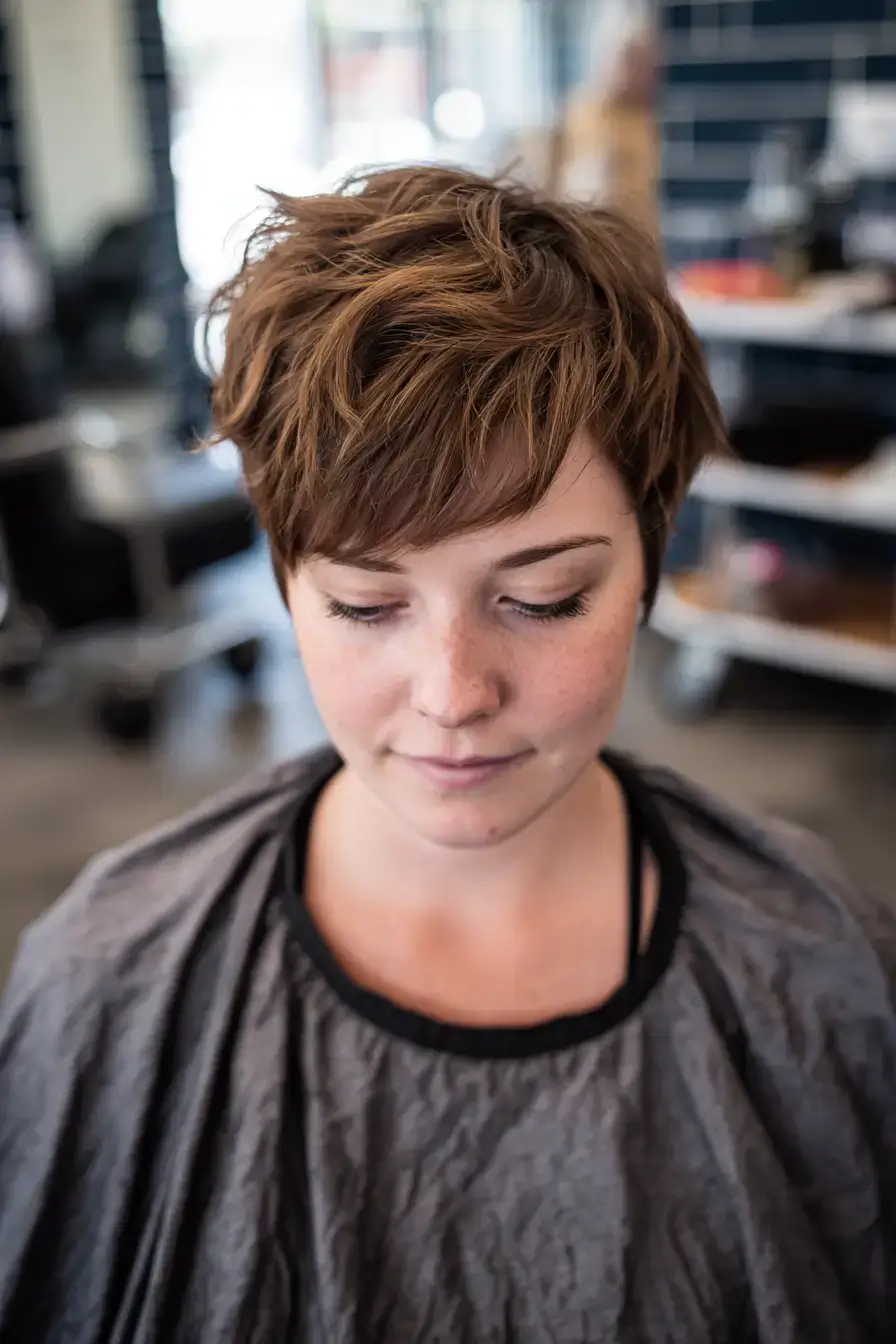
On thick hair, a pixie shag needs the sides thinned from the inside, or the shape sits like a helmet. On dry hair I cut the sides with scissor over comb, slide cut through them to take out bulk, then point cut the top to four inches. Thick density and 1B to 2B texture on oval and square faces suit it. Rough-dry with a light paste and move the top around. Trim every five weeks.
6. Long-Fringe Pixie Shag
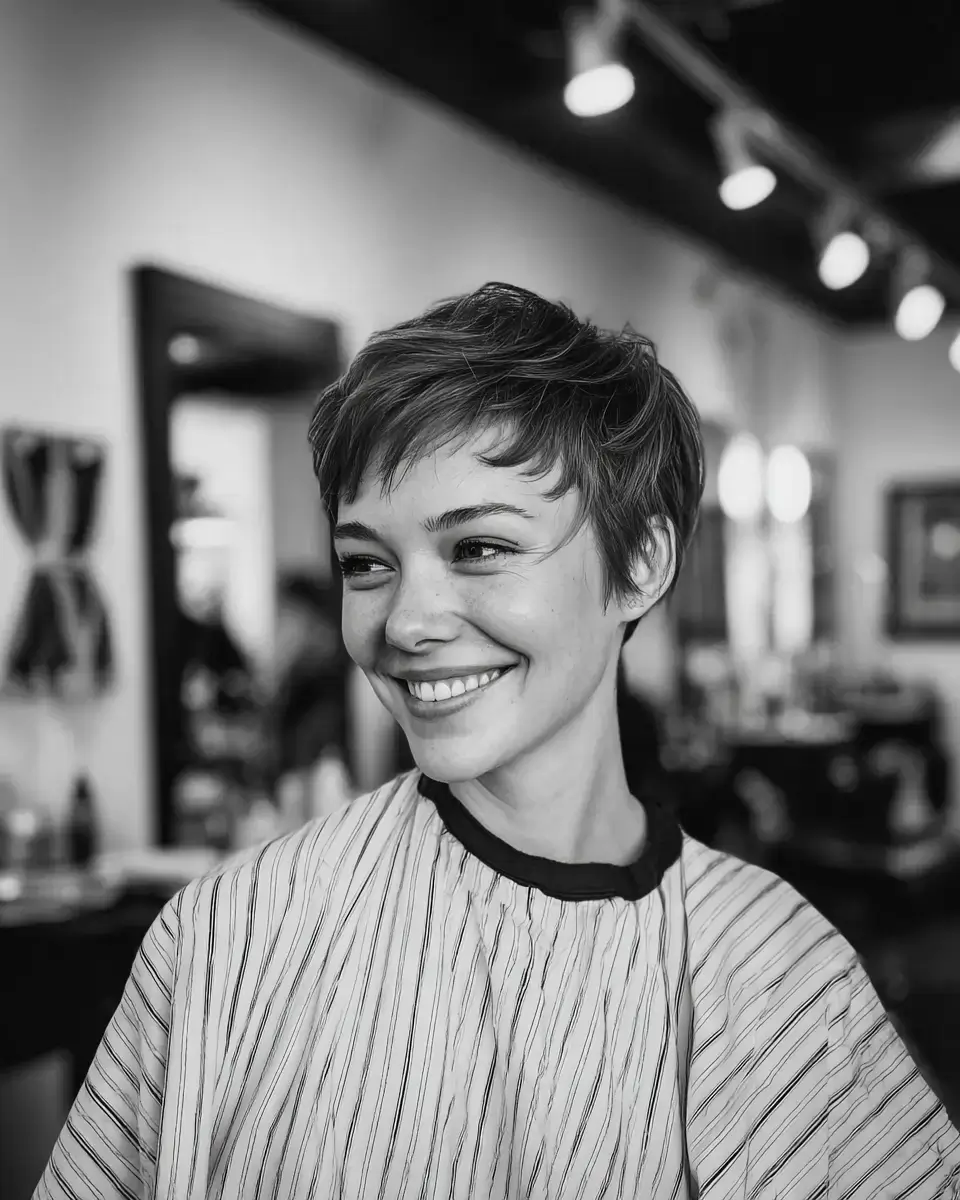
On a pixie shag, a long fringe drops to the cheekbone in pieces while the sides and nape stay short. On dry hair I cut the sides and nape with scissor over comb, leave the front at the cheekbone, then point cut the fringe and top. Fine to medium density and 1A to 2A texture on oblong and square faces suit it. Use a flat brush to blow-dry the fringe down, and rough-dry the rest. Trim the fringe every five weeks.
7. Pixie Shag Haircut for Women Over 50
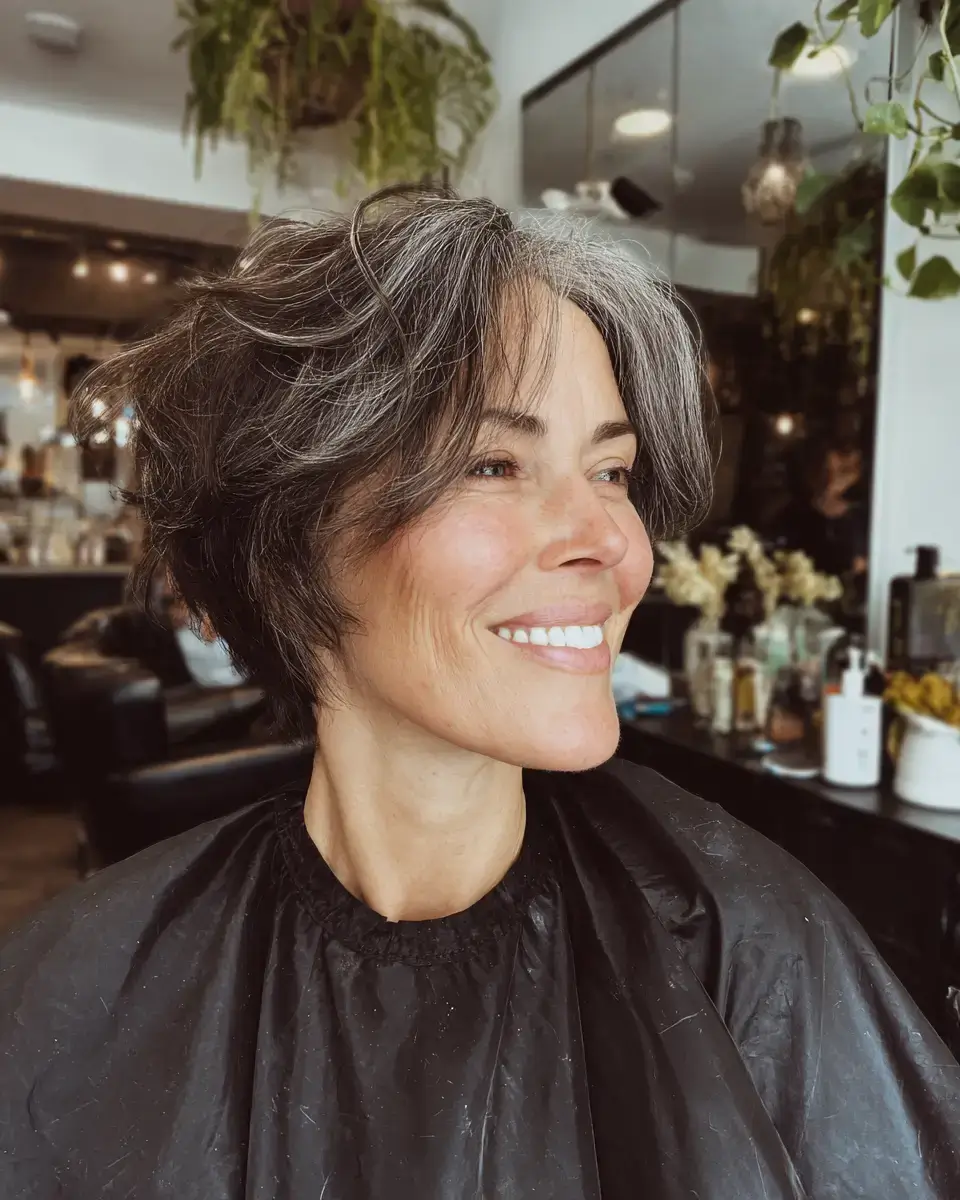
My pixie shag haircut over 50 holds the top at four inches with a side swept fringe. On dry hair I take the sides and nape with scissor over comb, point cut the top, then cut the fringe from the part to the cheekbone. Fine to medium density and 1A to 2A texture suit it. Use a round brush to blow-dry the top up, then set it with a light paste. Trim every five weeks.
8. The Wavy Pixie Shag
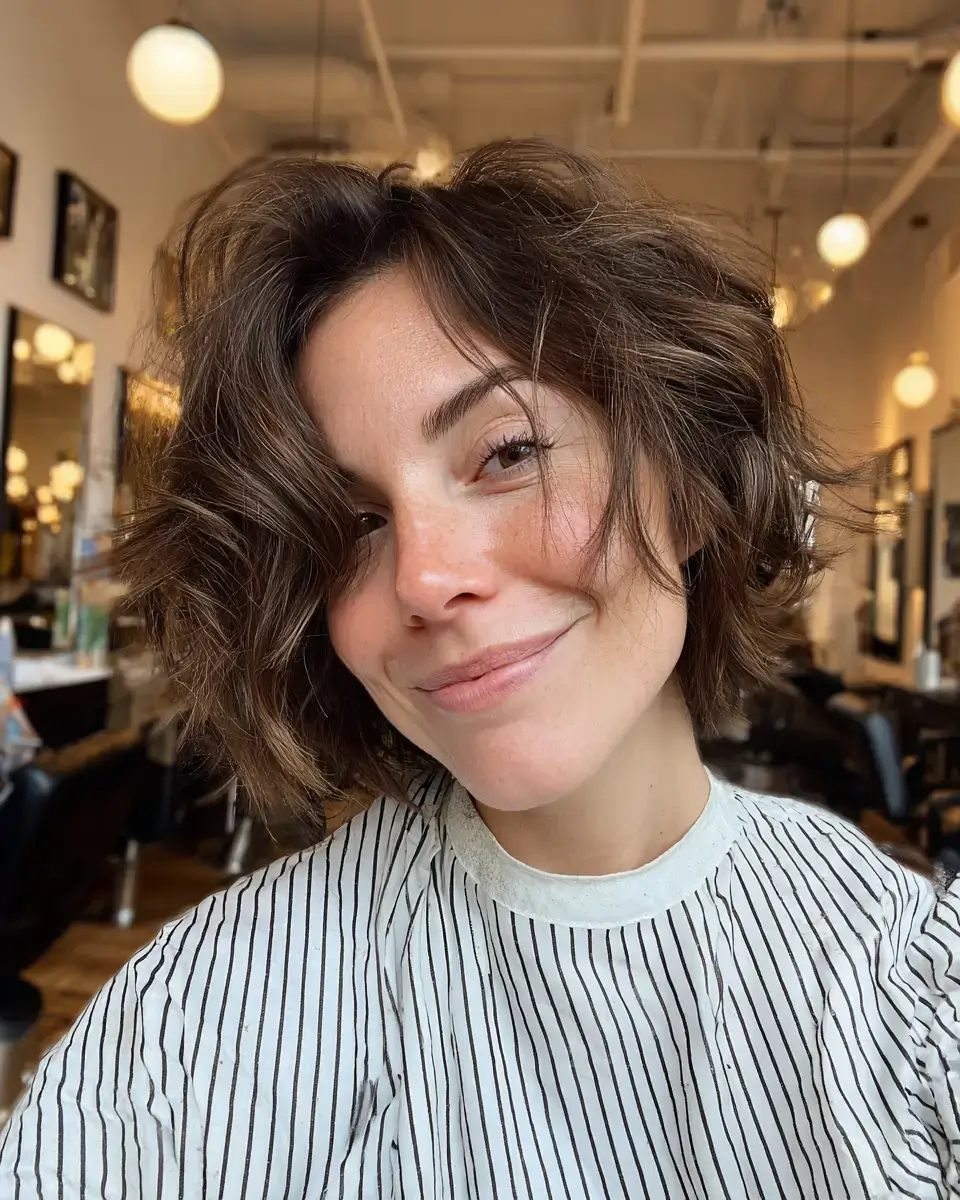
On 2A to 2C hair, a wavy pixie shag lets the top pieces bend in different directions. On dry hair I cut the sides with scissor over comb, point cut the top to four inches, then point cut the fringe to the brow. Fine to medium density on oval and square faces suits it. Scrunch sea salt spray into damp hair, rough-dry with your hands, and finish with a light paste. Trim every six weeks.
9. Micro-Bang Pixie Shag

On a pixie shag, micro bangs sit an inch above the brow and get point cut thin. On dry hair I cut the sides with scissor over comb, point cut the top to four inches, then cut the bangs high and thin them out. Fine to medium density and 1A to 1C texture on oval and heart faces suit it. Rough-dry the top and blow-dry the bangs flat. Trim the bangs every three weeks.
10. Tapered-Nape Pixie Shag Haircut
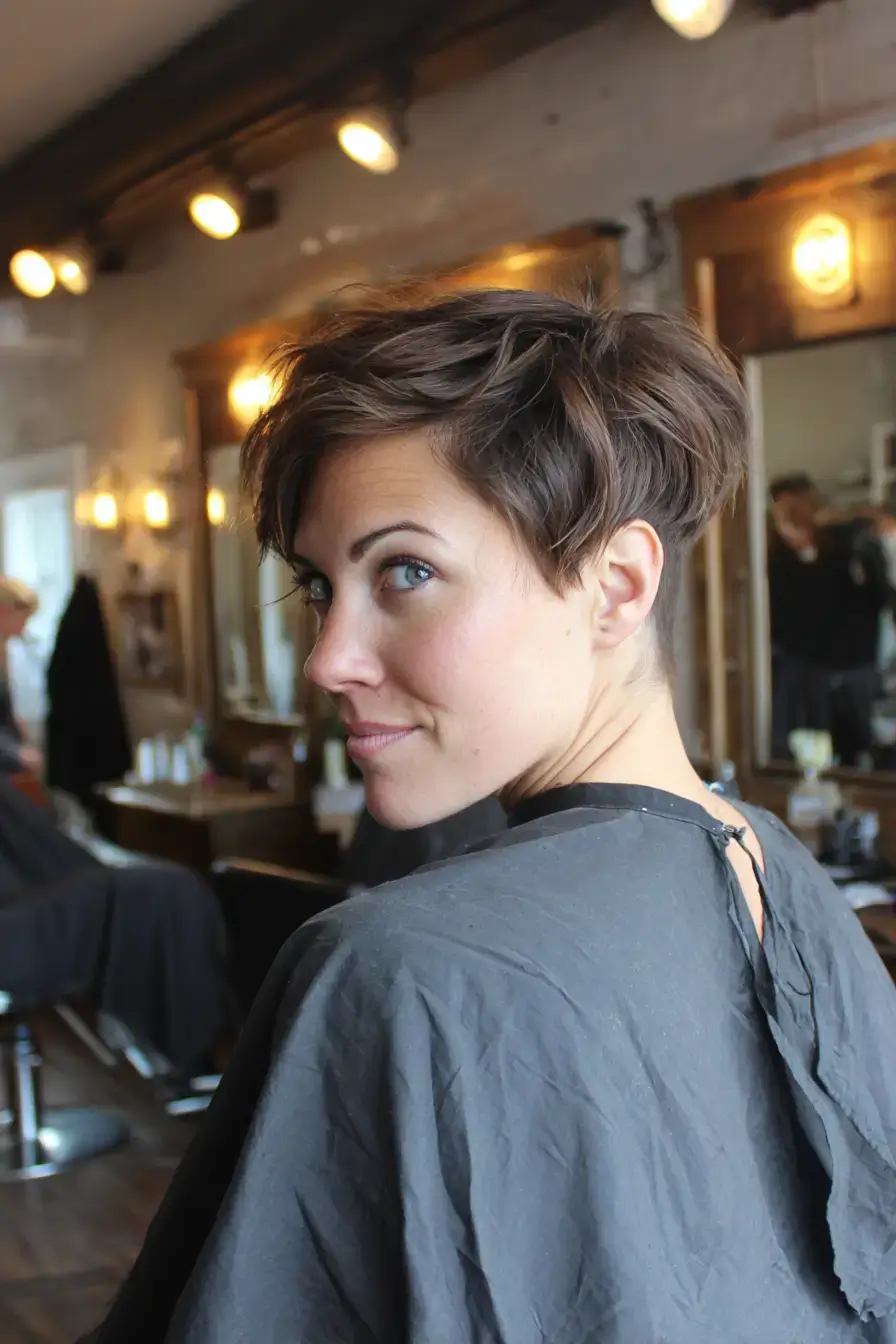
Under a pixie shag, a tapered nape keeps the back clean so the choppy top looks sharper. On dry hair I taper the nape with scissor over comb, point cut the top to four inches, then point cut the sides so they fall soft. Fine to thick density and 1A to 2B texture on oval and heart faces suit it. Rough-dry with a texture paste, pushing the top forward. Trim every five weeks.
11. The Curly Pixie Shag
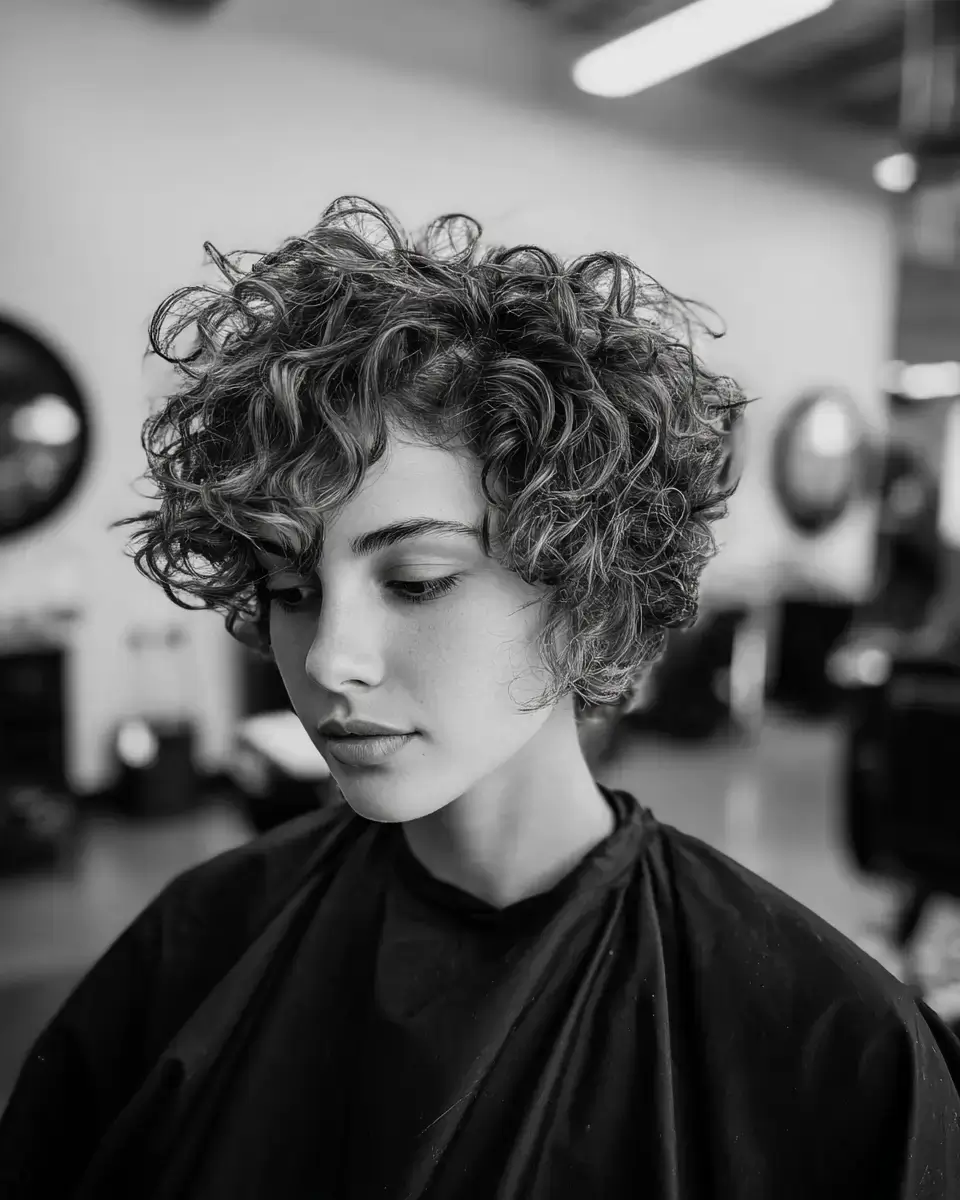
I cut a curly pixie shag dry, one curl at a time, leaving the top at four inches so the curls stack upward. The sides and nape go to two inches curl by curl, then the top to four, then I thin single curls at the fringe. Medium to thick density and 3A to 3C texture on oval and heart faces suit it. Diffuse on low after applying curl cream to wet hair. Trim every eight weeks.
12. Undercut Pixie Shag
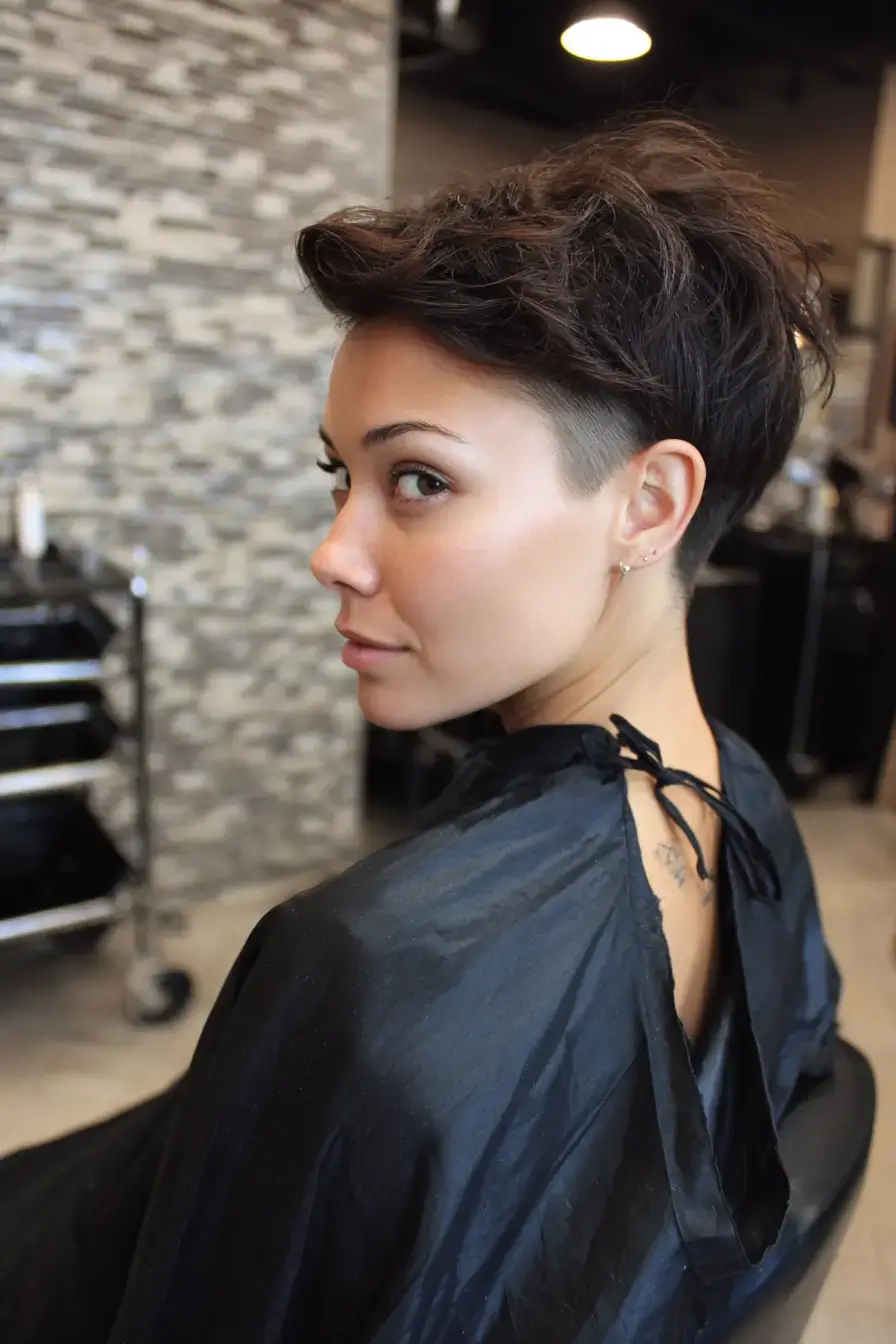
Beneath a pixie shag, an undercut takes the nape and lower sides to a number two so the top can sit heavy and choppy. On dry hair I clipper the nape and lower sides, then point cut the top to four inches and disconnect it. Medium to thick density and 1A to 2B texture on oval and heart faces suit it. Rough-dry using a texture paste. Trim the undercut every four weeks and the top every six.
13. Side-Part Pixie Shag Haircut
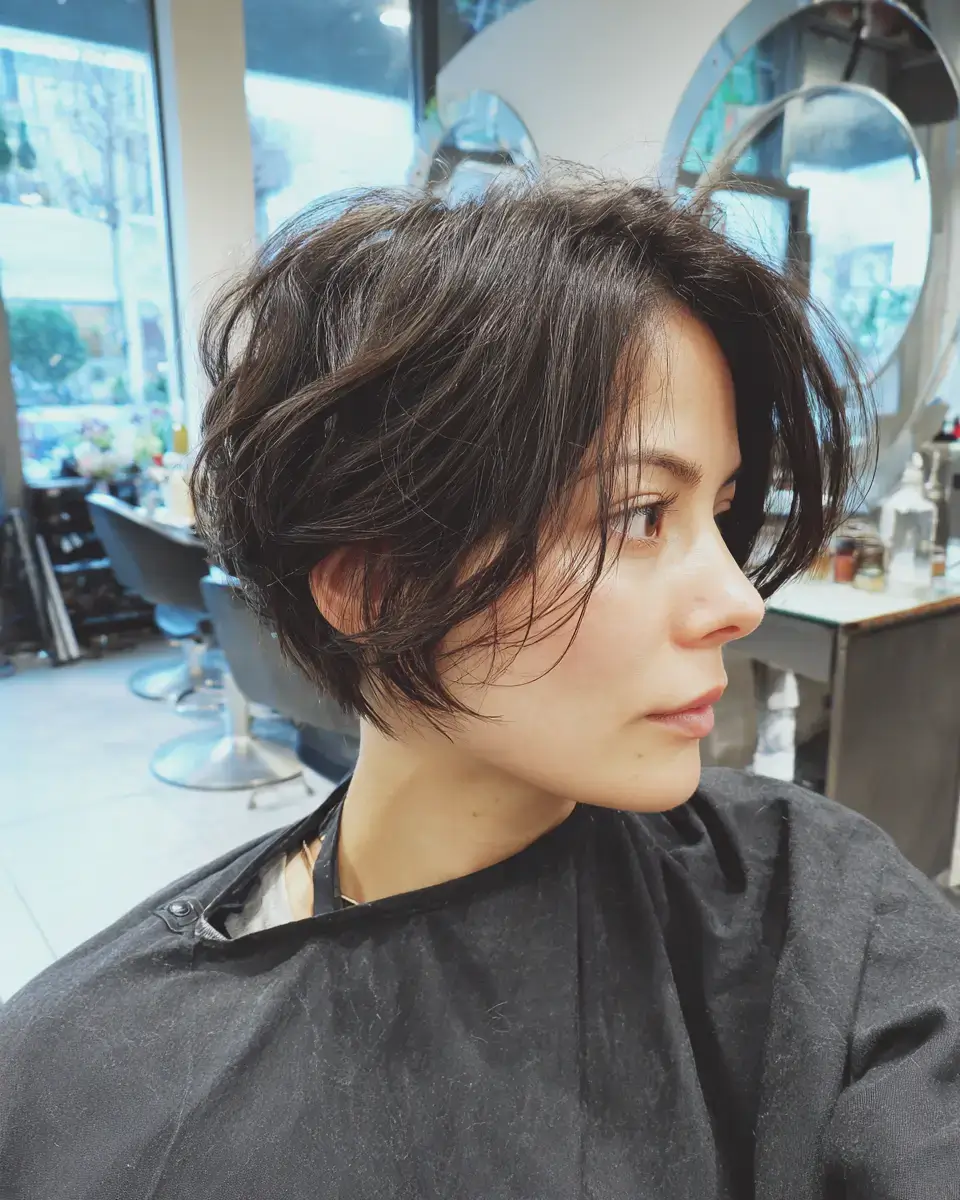
Parting a pixie shag to the side sends the top over in a choppy sweep. On dry hair I cut the sides with scissor over comb, point cut the top to four inches, then set the part two inches off center. Fine to thick density and 1A to 2B texture on round and square faces suit it. Use a flat brush to blow-dry the top across, then set it with paste. Trim every five weeks.
14. The Copper Pixie Shag

On a pixie shag, copper shows every choppy piece, since the light catches each end. On dry hair I cut the sides with scissor over comb, point cut the top to four inches, then apply a level seven copper from root to end. Fine to medium density and warm skin tones suit it. Rough-dry using a light paste. Refresh the tone every five weeks and trim in the same visit.
15. Long-Nape Pixie Shag
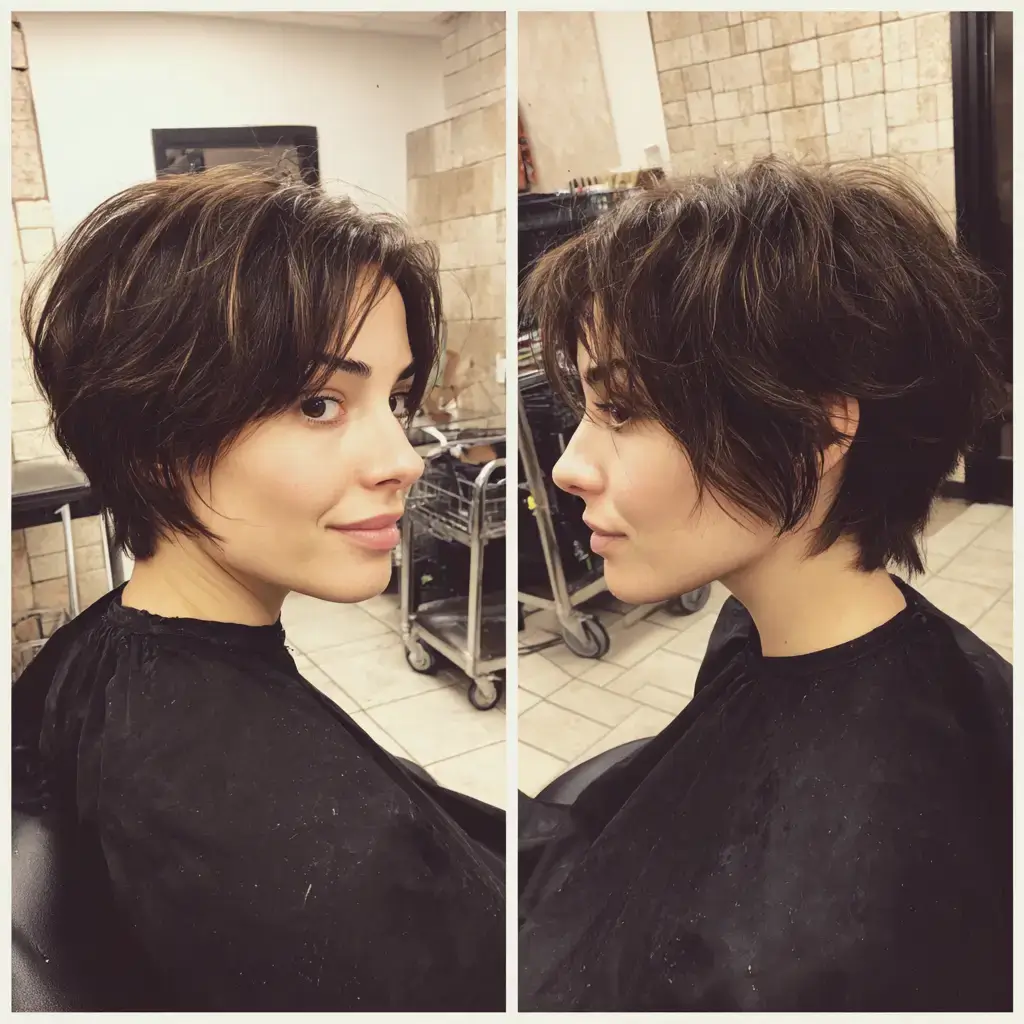
On a pixie shag, long nape pieces leave two inches of wispy length at the back while the sides stay short. On dry hair I cut the sides with scissor over comb, point cut the top to four inches, then leave the nape long and point cut it until it feathers. Fine to medium density and 1A to 2B texture on oval and square faces suit it. Rough-dry using a texture paste. Trim every five weeks.
16. Pixie Shag Haircut for Women Over 60
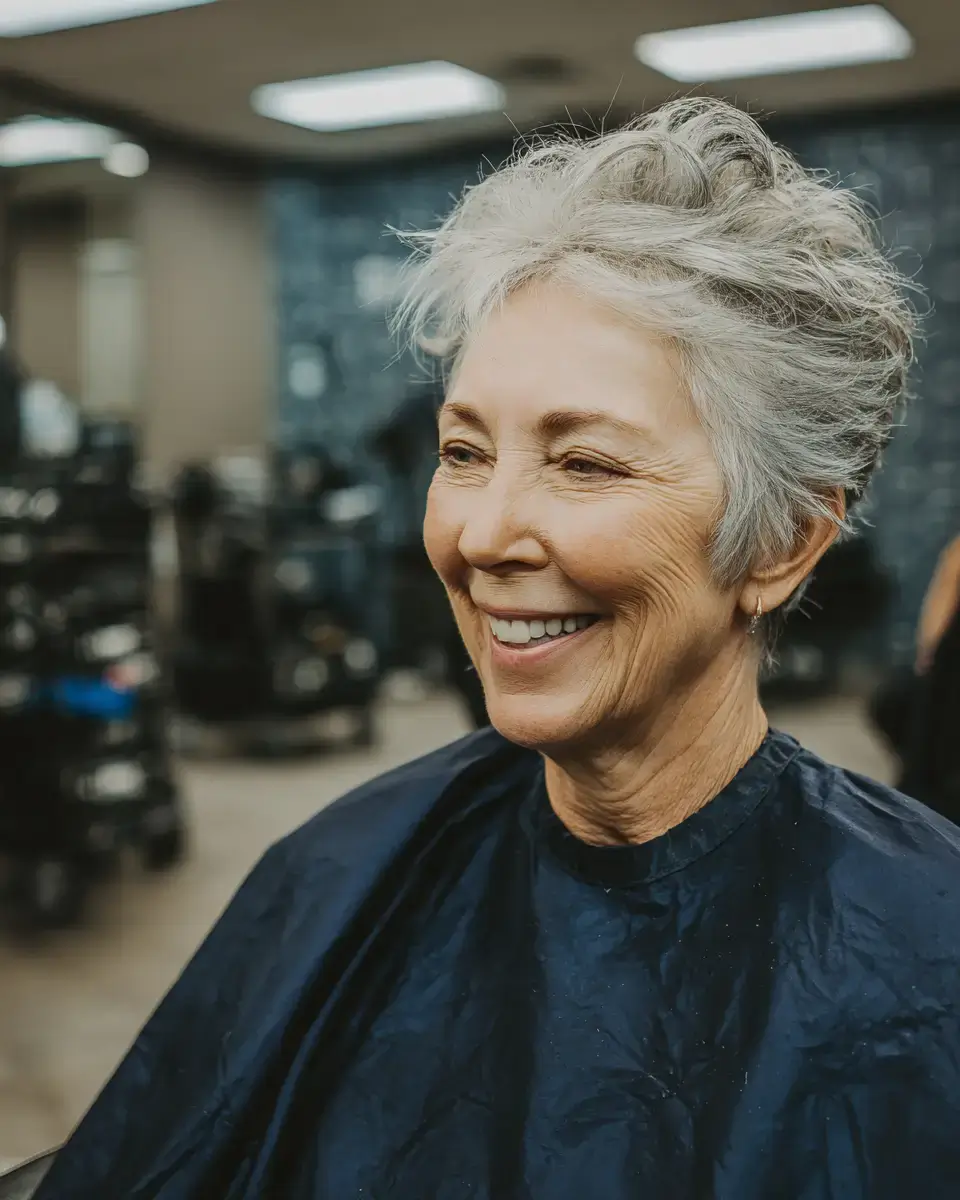
My pixie shag haircut over 60 keeps the top at four inches, the sides soft instead of clippered, and the fringe swept to the side. On dry hair I take the sides with scissor over comb, point cut the top, then cut the fringe to the cheekbone. Fine to medium density and 1A to 2A texture suit it. With mousse and a round brush, blow-dry the top up. Trim every five weeks and gloss every eight.
17. The Platinum Pixie Shag
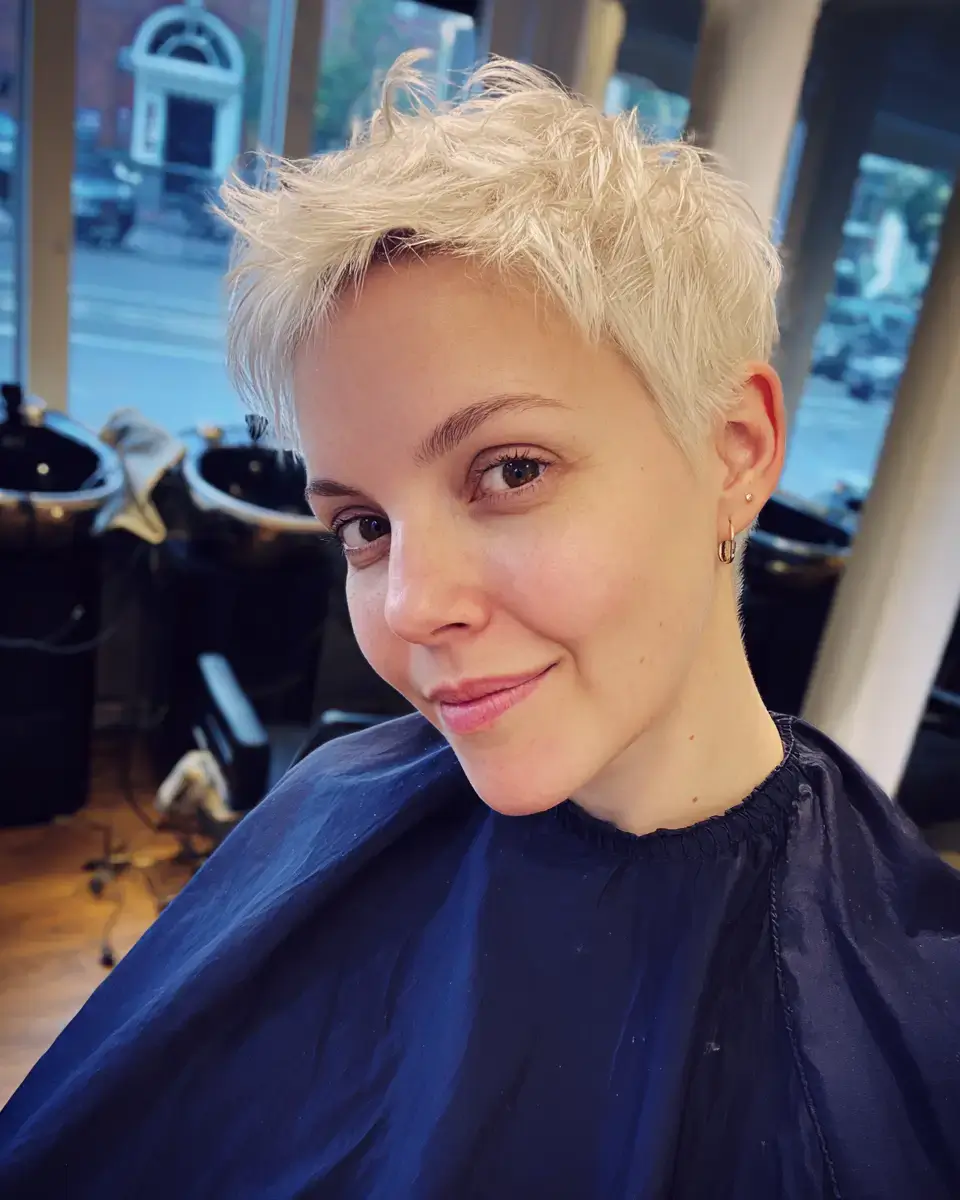
A platinum pixie shag looks bright at every point cut end, and the short length takes lightener evenly. On dry hair I cut the sides with scissor over comb, point cut the top to four inches, then lift to a level ten and tone with a violet toner. Fine to medium density and cool skin tones suit it. Rough-dry with a light paste and use a bond builder each week. Retouch every four weeks.
18. Round Face Pixie Shag
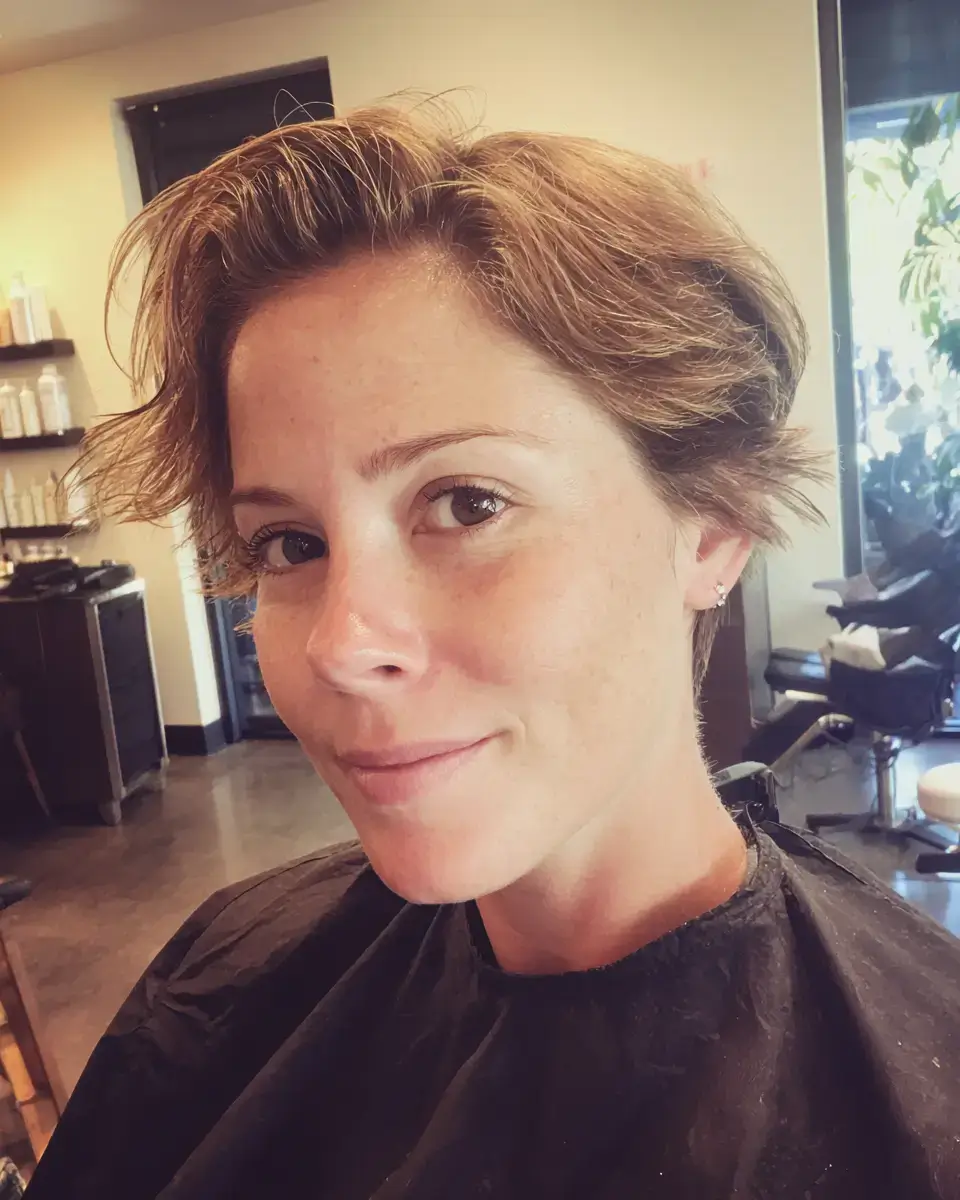
For a round face, a pixie shag keeps the sides close and the top tall, so the height comes from the crown. On dry hair I take the sides to an inch and a half, point cut the top to five inches, then leave the front long to the cheekbone. Fine to medium density and 1A to 2B texture suit it. With a round brush, blow-dry the top up and back and set it with paste. Trim every five weeks.
19. Wispy-Bang Pixie Shag

On a pixie shag, I point cut wispy bangs thin so a few pieces rest between the brows under the longer top. On dry hair the sides are cut with scissor over comb and the top point cut to four inches, then the bangs are cut at the brow and thinned. Fine to medium density and 1A to 2A texture on oval and oblong faces suit it. Rough-dry the top and blow-dry the bangs down. Trim the bangs every four weeks.
20. Money-Piece Pixie Shag Haircut
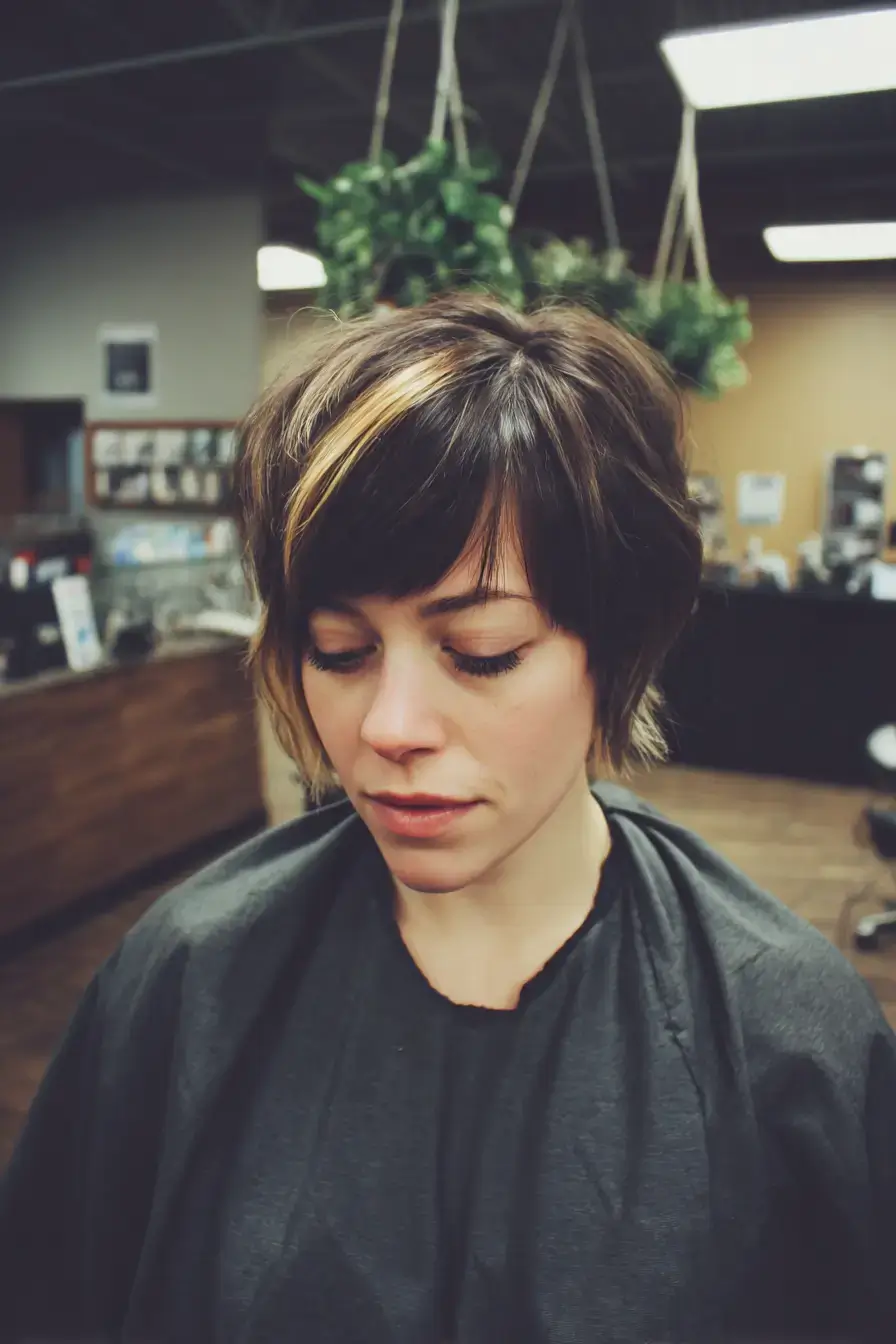
On a pixie shag, a money piece brightens the fringe and the two front pieces. On dry hair I cut the sides with scissor over comb, point cut the top to four inches, then lift the fringe and two front sections to a level nine and tone them beige. Fine to medium density and 1A to 2B texture suit it. Rough-dry with a light paste and pull the front pieces forward. Refresh every ten weeks.
21. The Feathered Pixie Shag
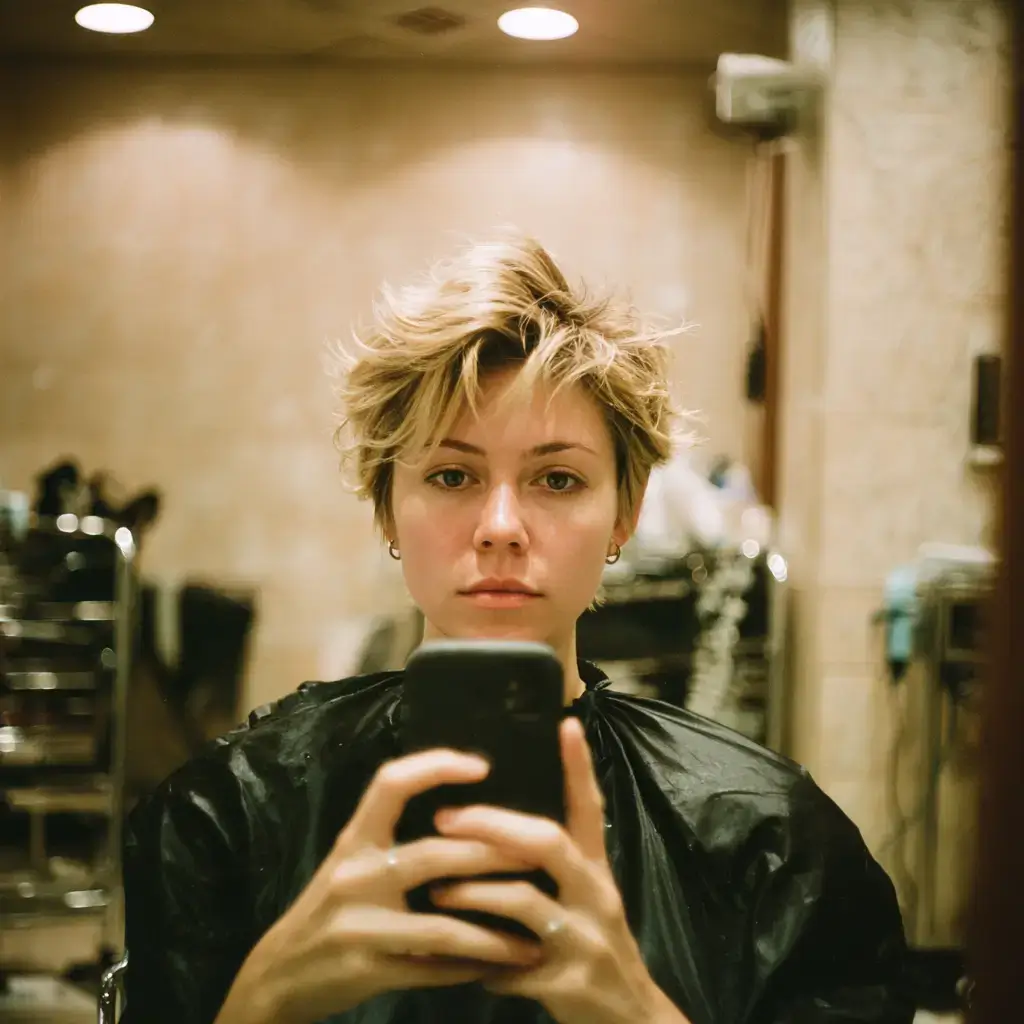
In a feathered pixie shag, the top is blown back so the pieces lie in one direction. On dry hair I cut the sides with scissor over comb, point cut the top to four inches with the shears angled out, then point cut the fringe. Fine to medium density and 1A to 2A texture on round and square faces suit it. Use a small round brush to blow-dry the top back, then set it with a light spray. Trim every five weeks.
22. Straight Hair Pixie Shag

On straight hair, a pixie shag needs each piece point cut, or the top sits in a flat line. On dry hair I cut the sides with scissor over comb, point cut the top to four inches, then point cut deep into the fringe. Fine to medium density and 1A to 1C texture on oval and square faces suit it. Rough-dry, then use a flat iron to bend the top pieces in different directions. Trim every five weeks.
23. The Dark Brunette Pixie Shag
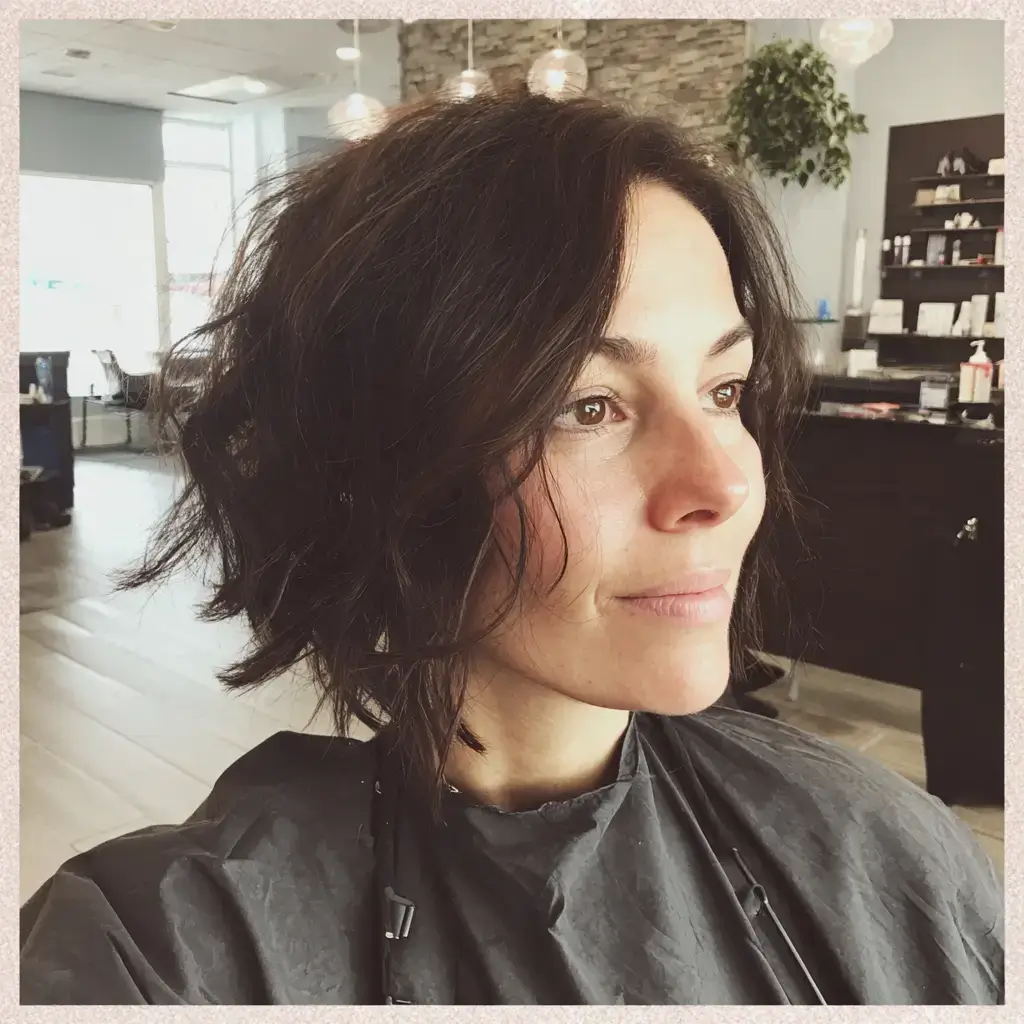
In dark brunette, a pixie shag looks sharp at the sides against the skin and soft through the top. On dry hair I cut the sides with scissor over comb, point cut the top to four inches, then apply a level four demi from root to end. Fine to thick density and cool or neutral skin tones suit it. Rough-dry using a light paste. Refresh the tone every eight weeks.
24. Shullet-Tail Pixie Shag Haircut
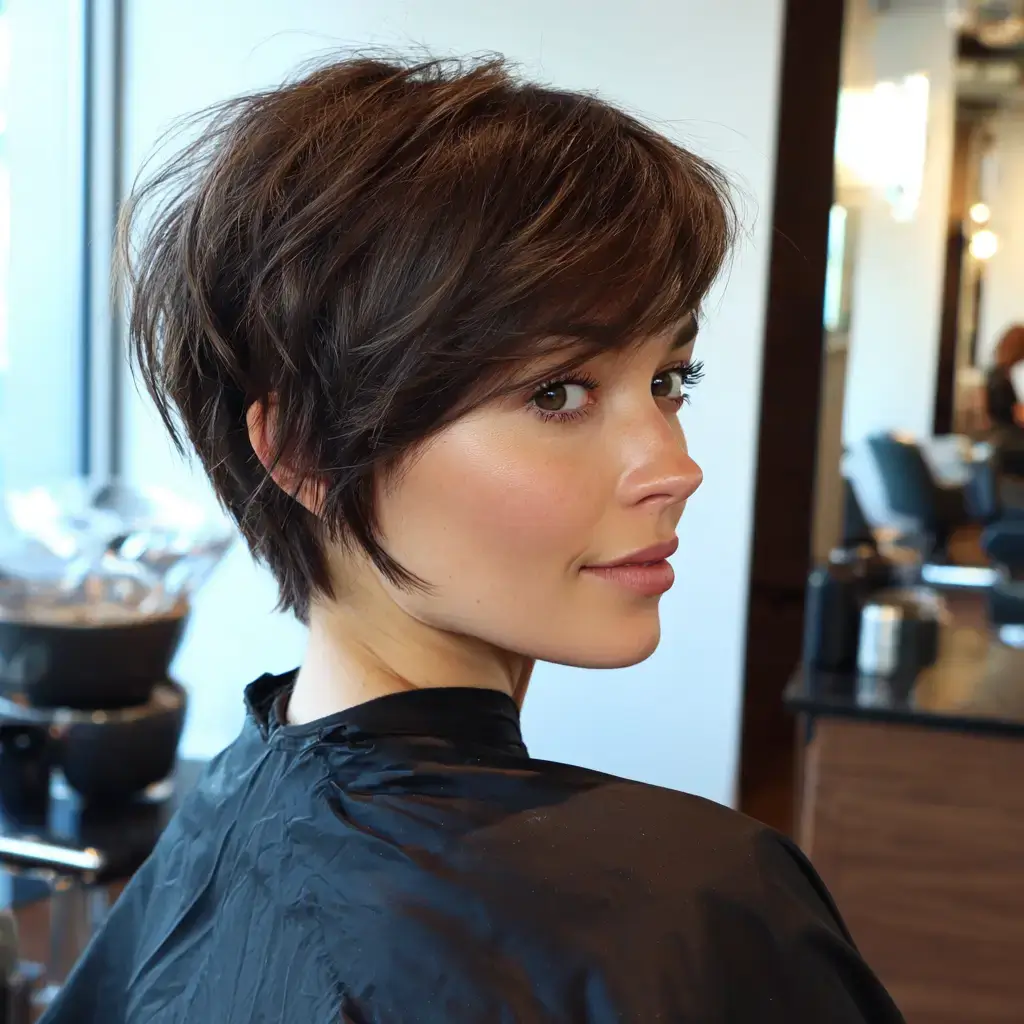
With a shullet tail, a pixie shag haircut leaves four inches of wispy length at the nape under a short top. On dry hair I cut the sides with scissor over comb, point cut the top to four inches, then leave the nape long and thin it until it feathers. Medium to thick density and 1B to 2C texture on oval and square faces suit it. Rough-dry using a texture paste. Trim the top every five weeks.
25. Square Face Pixie Shag
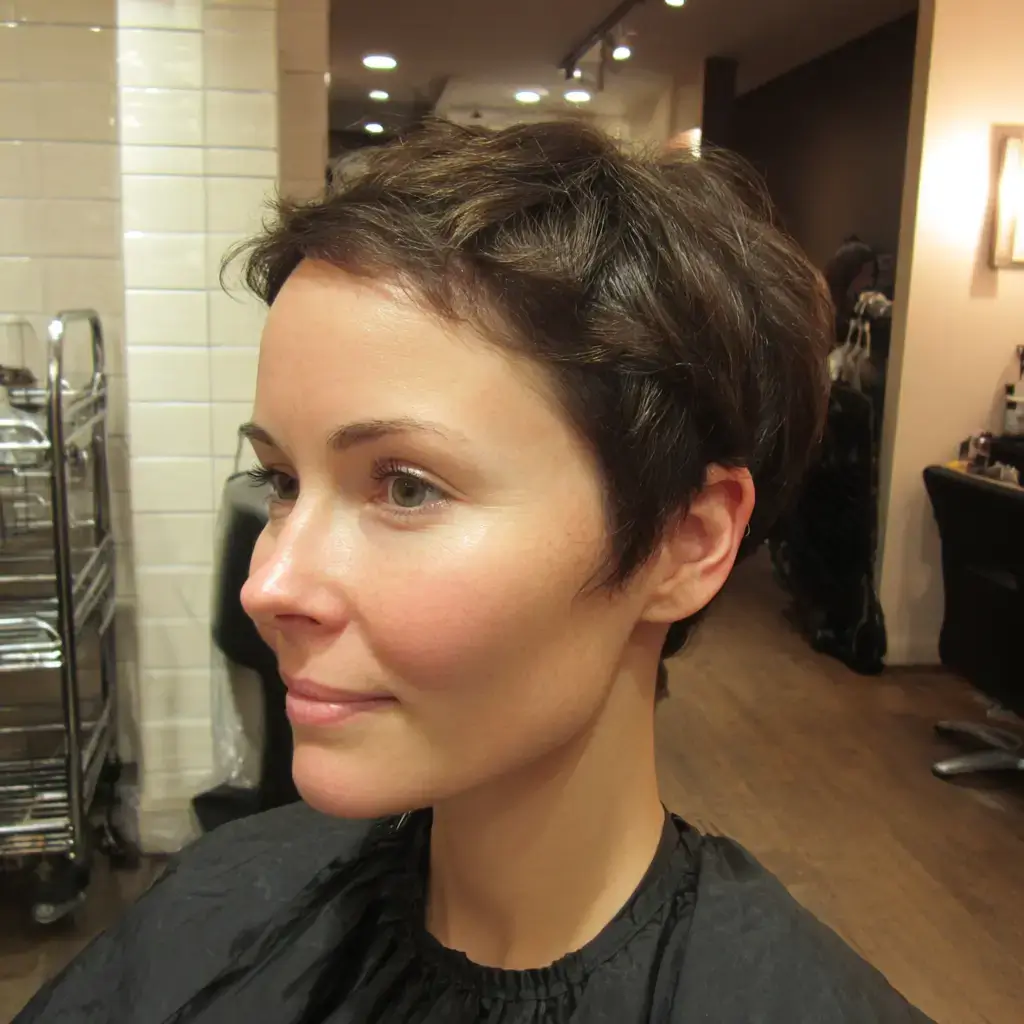
For a square face, a pixie shag keeps the pieces at the temple and jaw soft so the corners don’t look hard. On dry hair I cut the sides with scissor over comb, point cut the top to four inches, then leave the front to the cheekbone and point cut it thin. Fine to medium density and 1A to 2B texture suit it. Rough-dry with a light paste and leave the front falling forward. Trim every five weeks.
See also shag bob haircut and shoulder length shag haircut.
A pixie shag haircut reads sharp from the short textured crown and the shaggy pieces at the temple, because that contrast is what gives it edge. A small amount of paste is all the styling asks for.