Fine hair that sits flat by noon usually needs less length, not more product. A pixie bob haircut for fine hair keeps the perimeter at the ear so the crown can lift. Most of these are cut on dry hair, rough-dry in a few minutes with a light paste, and need a trim every four to five weeks.
1. The Classic Pixie Bob
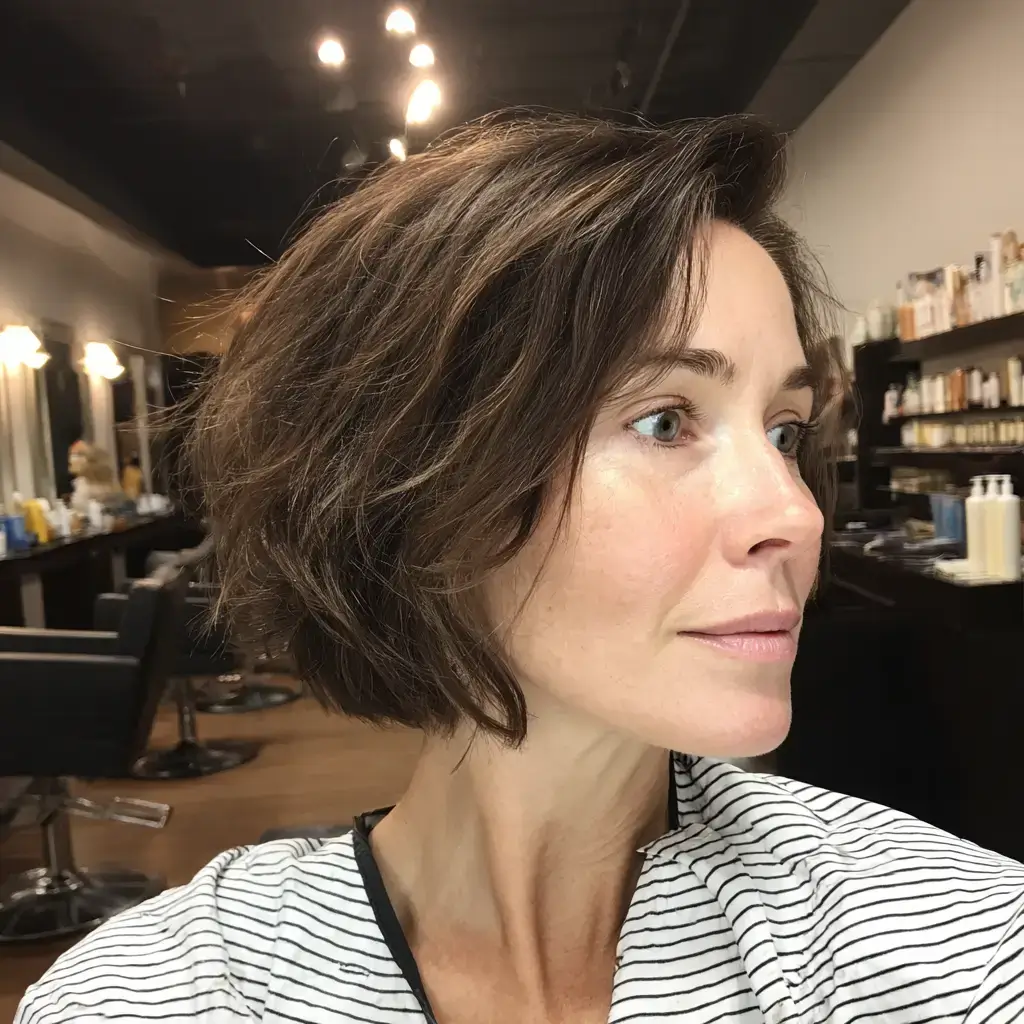
In its classic form, the pixie bob haircut for fine hair sits at the ear, with a longer fringe and short layers on top. Working on dry hair, I cut the perimeter at the ear, point cut the crown to three inches, and leave the front at the cheekbone. Fine density with an oval or heart face wears it best. Push the top forward and rough-dry with a light paste. Trim every five weeks.
2. Side-Swept-Fringe Pixie Bob
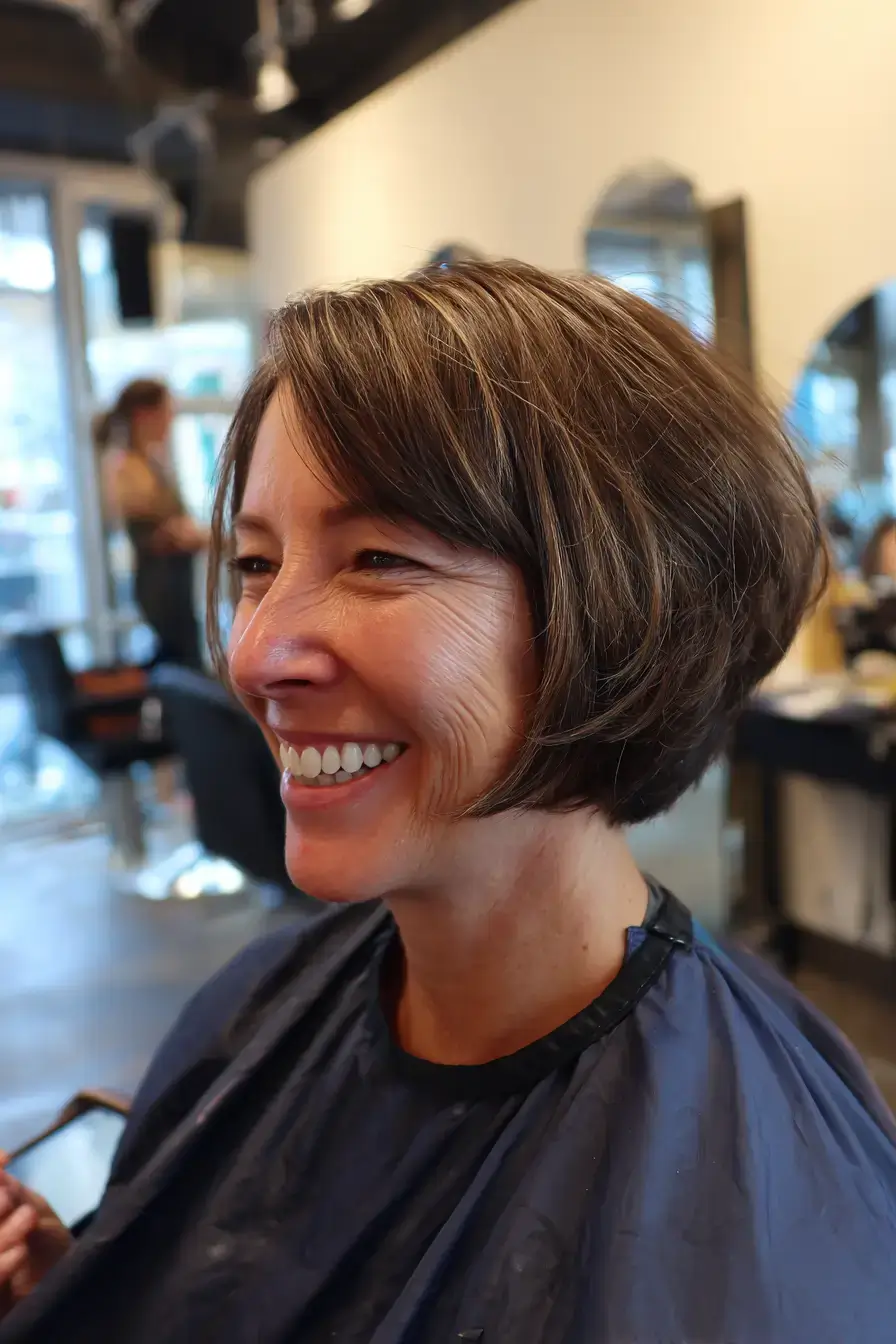
On a pixie bob, a side swept fringe runs from the part across to the cheekbone. I cut the ear-length perimeter on dry hair, point cut the crown, then cut the fringe from the part to the cheekbone and point cut the ends. Fine density with a round or square face suits it. Use a flat brush to blow the fringe across. Trim every five weeks.
3. The Razor Cut Pixie Bob
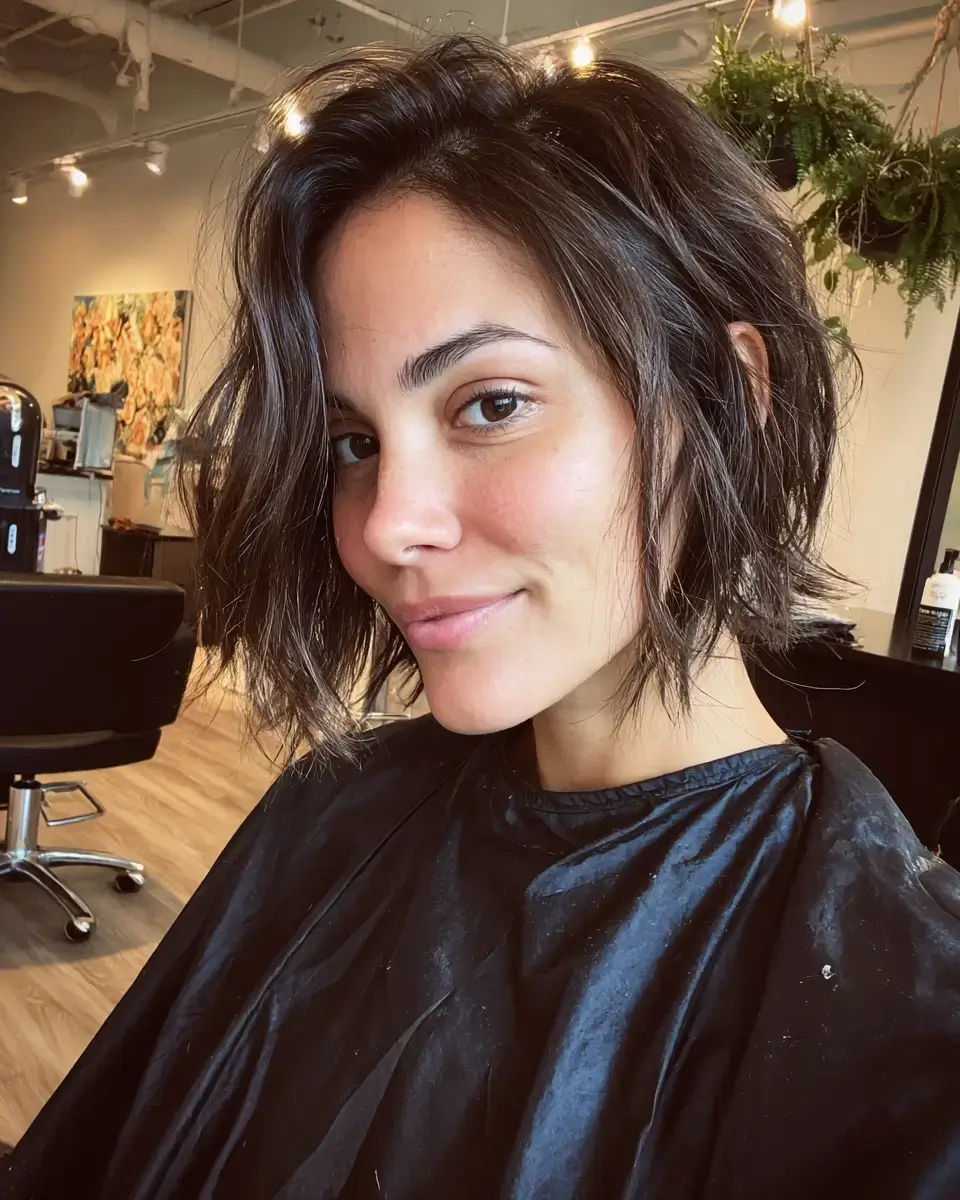
With a razor cut pixie bob, each end comes out wispy. On dry hair I cut the perimeter at the ear with the razor at a low angle, razor the crown layers, then razor the front pieces down to the cheekbone. Fine density with an oval or heart face wears it best. Rough-dry using a sea salt spray and let the ends fall where they want. Trim every five weeks.
4. Soft-Layered Pixie Cuts for Fine Hair
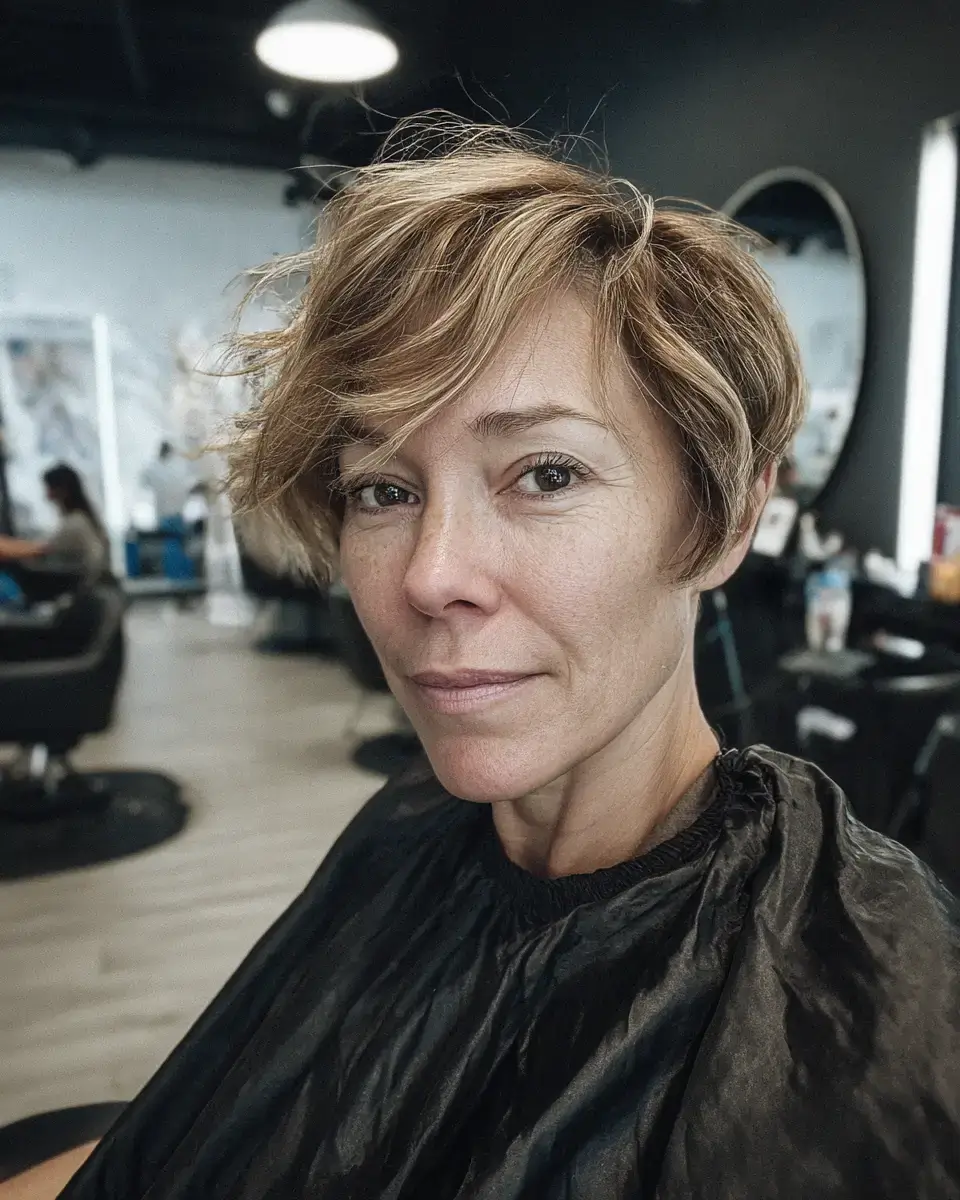
When a client wants no hard lines, soft layers are the version of pixie cuts for fine hair I reach for. On dry hair I cut the sides and nape scissor over comb, point cut the top to three inches, then texturize each section. Fine density and most face shapes suit it. Push the top forward and rough-dry with a light paste. Trim every four weeks.
5. Blunt-Fringe Pixie Bob
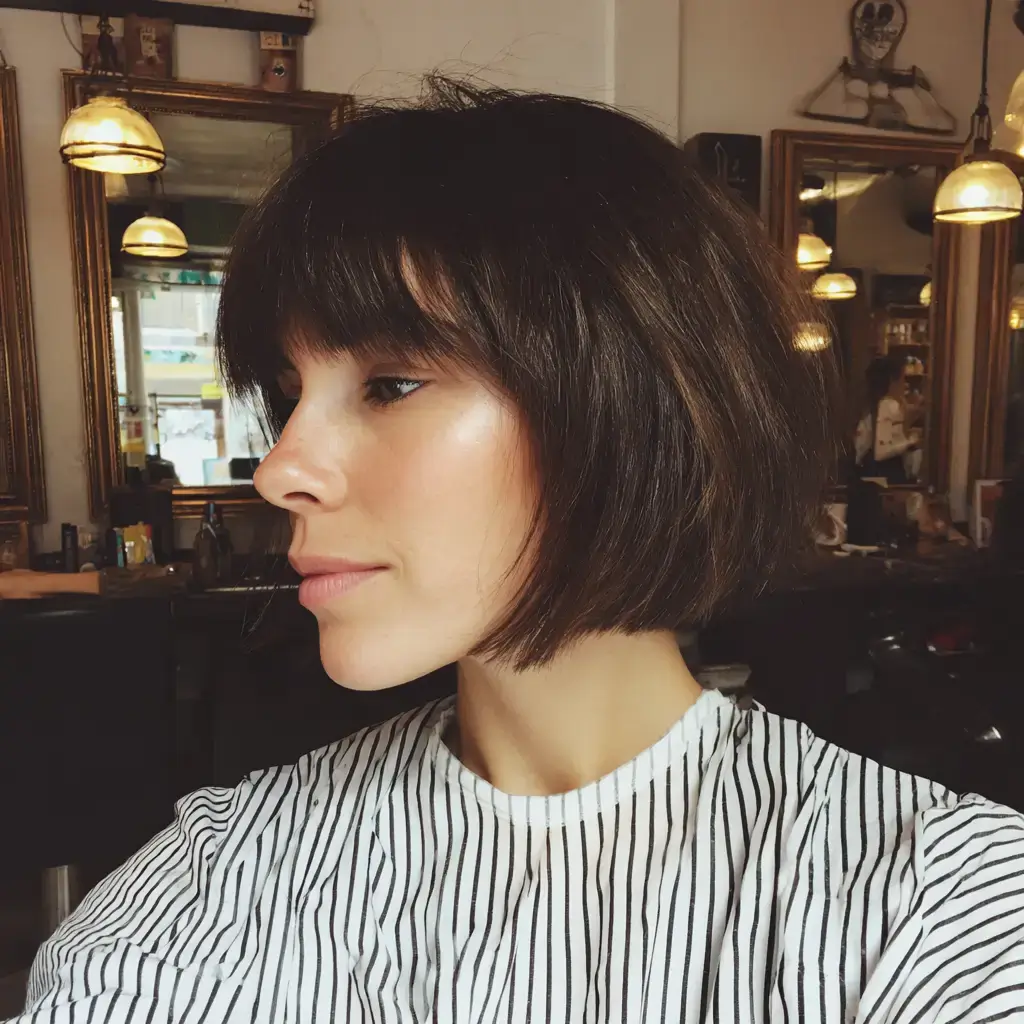
On a pixie bob, a blunt fringe sets one clean line for the eye. I cut the ear-length perimeter on dry hair, point cut the crown, then cut the fringe straight across at the brow. Fine density with an oval or long face suits it. Use a small brush to blow the fringe flat and rough up the crown. Trim the fringe every four weeks.
6. Pixie Bob Haircut for Fine Hair Over 50 With a Lifted Crown
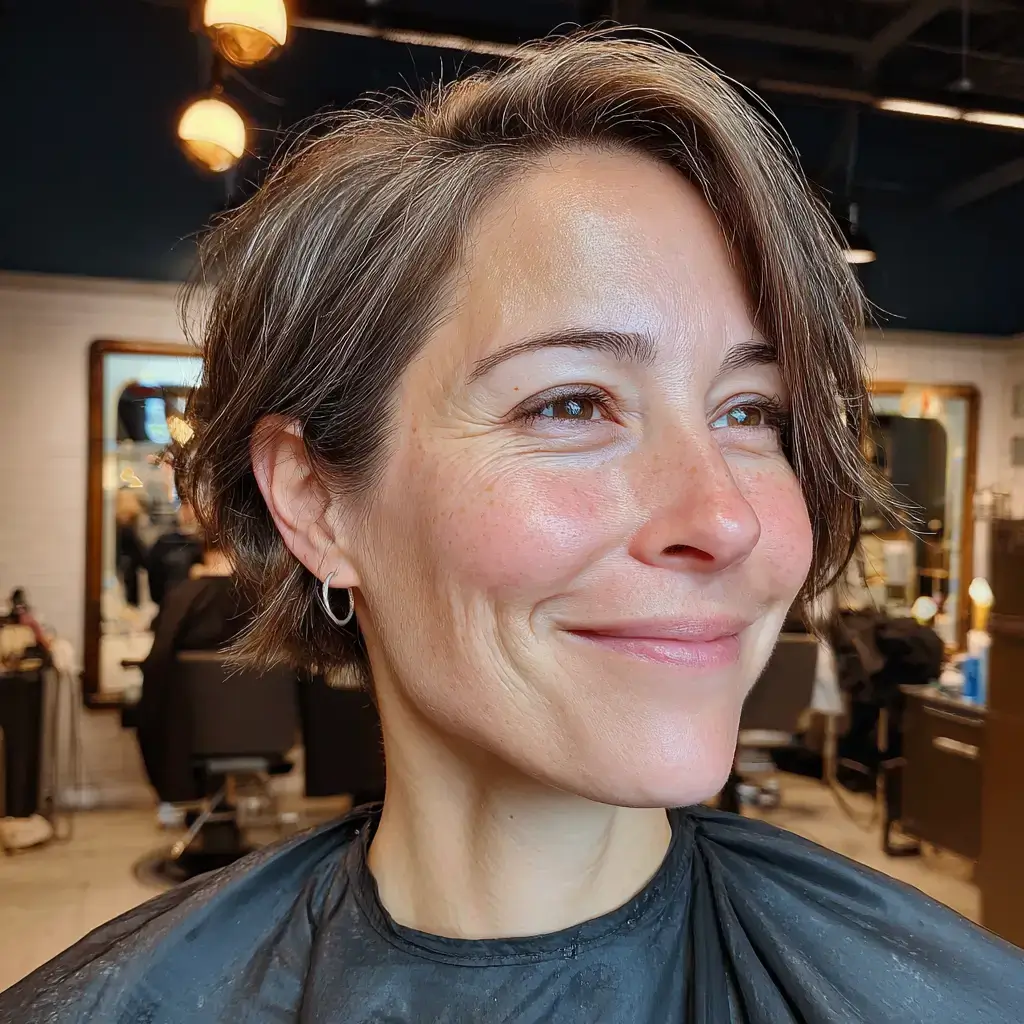
For a pixie bob haircut for fine hair over 50, I keep the nape clean and the crown lifted. On dry hair I cut the nape scissor over comb, point cut the crown to three inches, and leave the front at the cheekbone. Fine density and most face shapes wear it well. Use a root lifting mousse and blow-dry upside down, then smooth the front. Trim every five weeks and gloss every eight.
7. The Stacked Pixie Bob
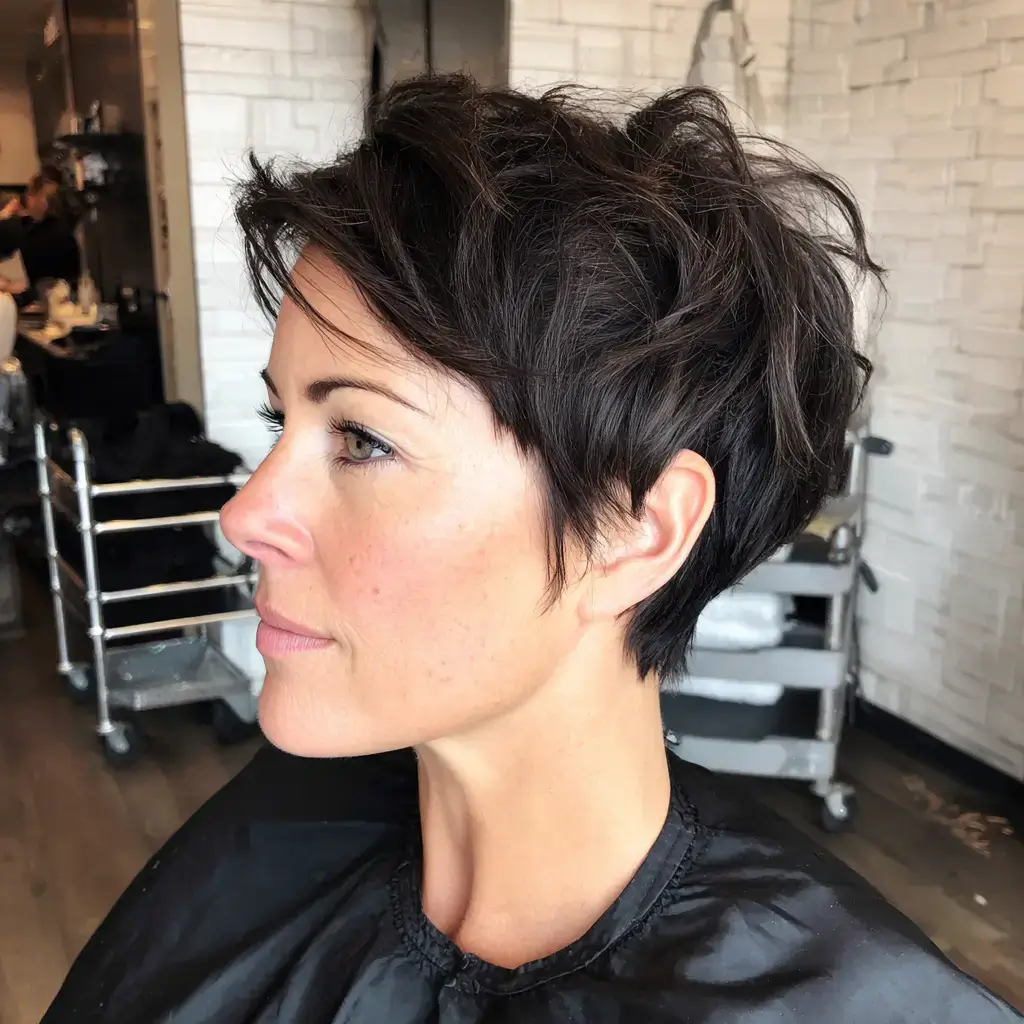
With a stacked pixie bob, short graduated layers build height at the back. On dry hair I cut the nape short with graduation, stack layers up to the crown, keep the front at the ear, then point cut the ends. Fine density with a round or square face suits it. Roll a round brush under to blow-dry the back. Trim every five weeks.
8. Micro-Fringe Pixie Bob
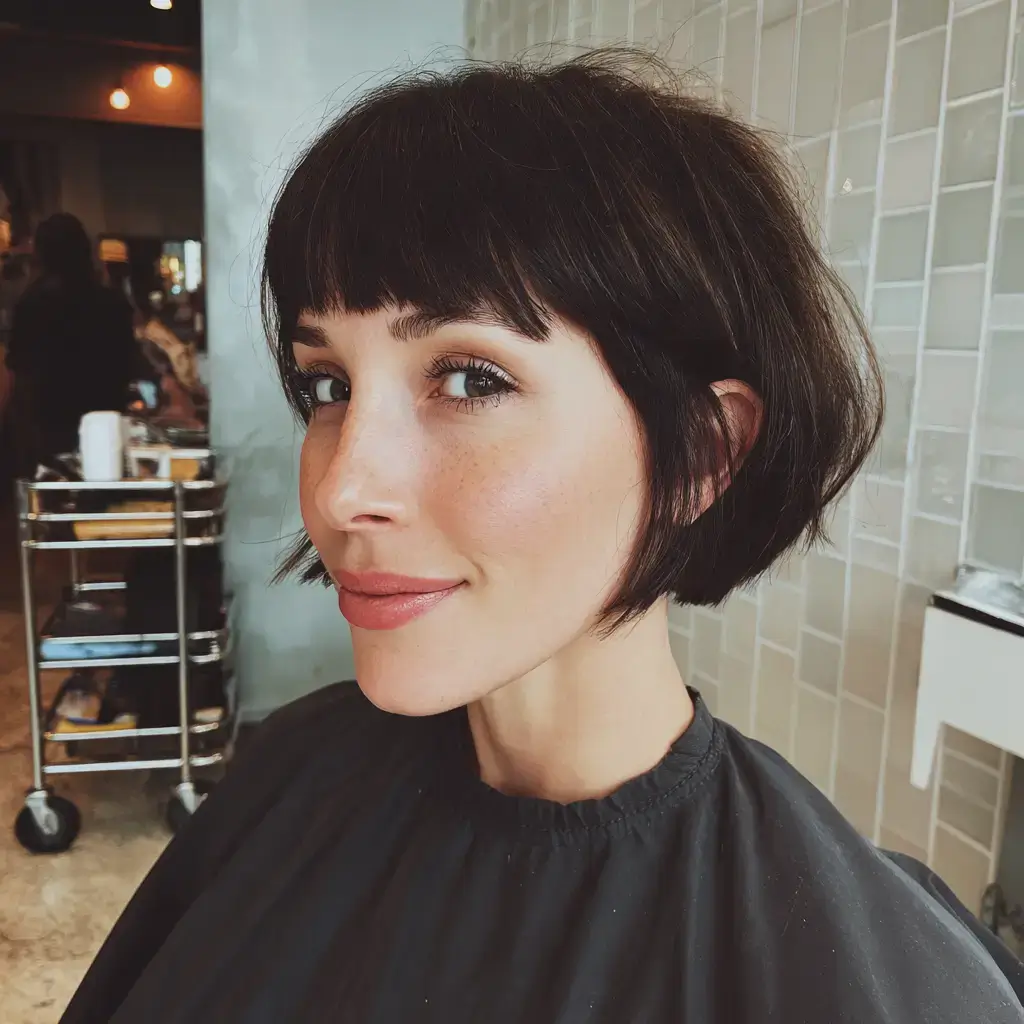
On a pixie bob, a micro fringe places one short line an inch above the brow. I cut the ear-length perimeter on dry hair, point cut the crown, then cut the fringe straight across one inch above the brow. Fine density with an oval or long face suits it. Use a small brush to blow the fringe flat. Trim the fringe every three weeks.
9. The Shaggy Pixie Bob
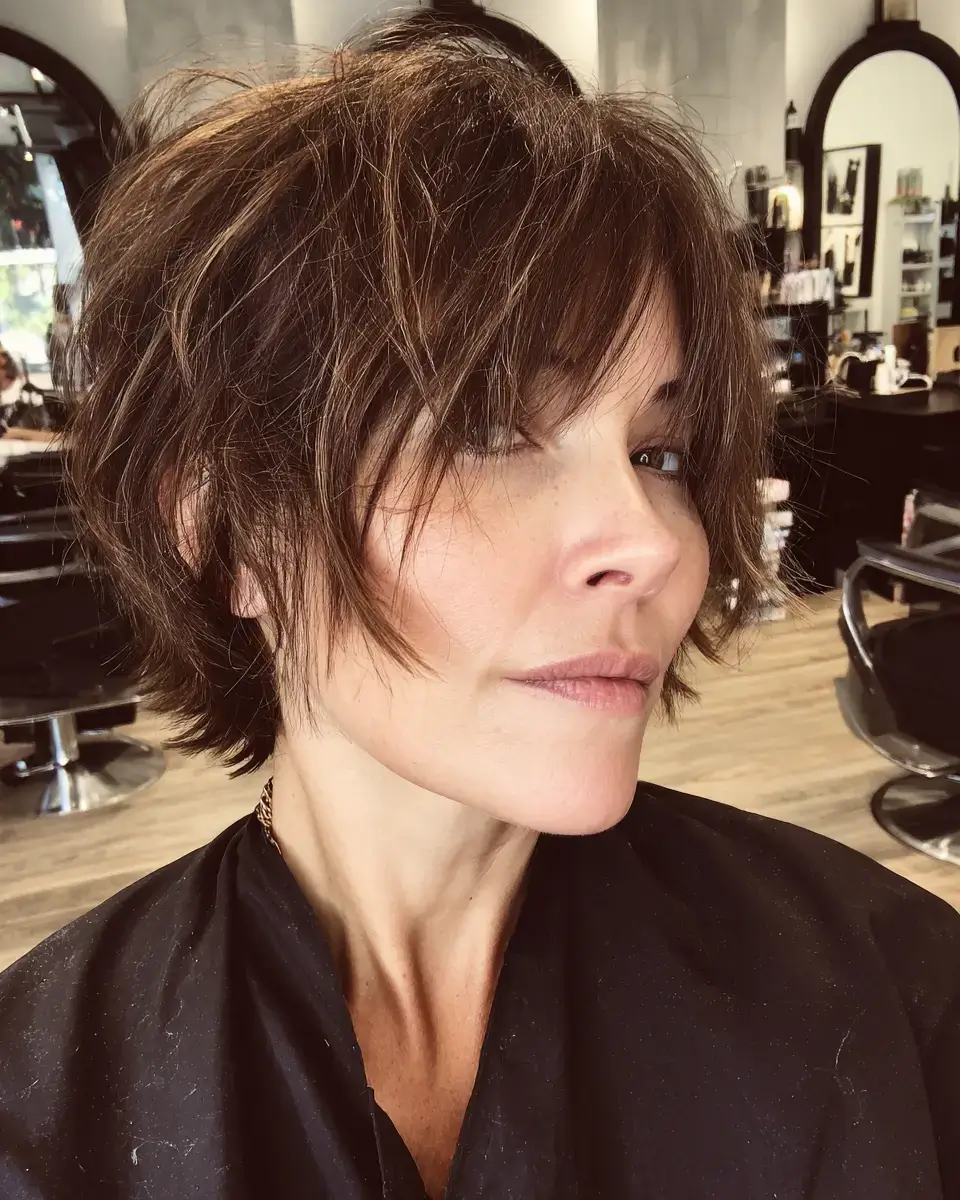
I point cut through the crown of a shaggy pixie bob so each end stands apart. On dry hair I cut the perimeter at the ear, point cut short layers at the crown, then razor the sides. Fine density with an oval or round face suits it. Rough-dry using a texture spray, push the crown up, and let the ends fall as they do. Trim every five weeks.
10. Undercut Pixie Bob
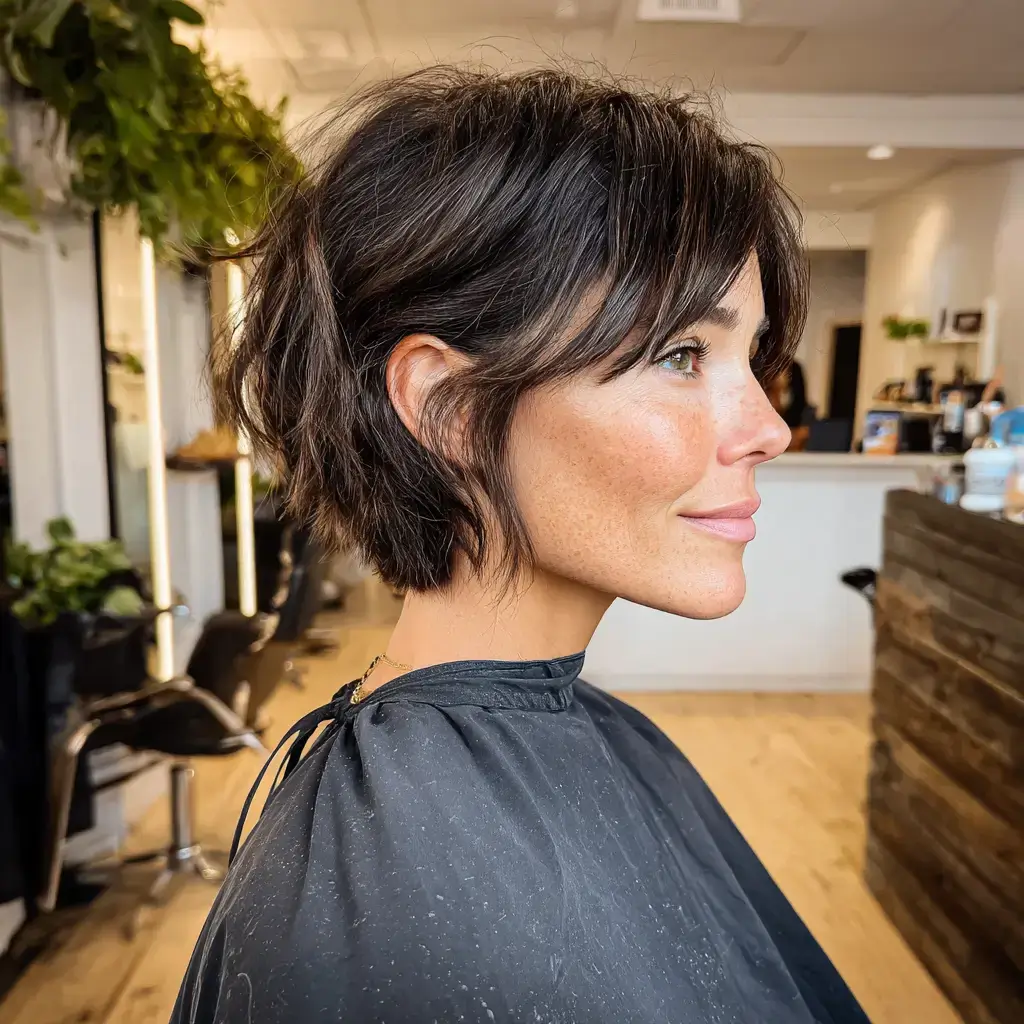
Putting an undercut under a pixie bob removes bulk from the nape. On dry hair I clipper the nape to a number two, cut the perimeter at the ear so it covers the clippered section, then point cut the crown. Fine density with an oval or long face suits it. Rough-dry using a light paste. Retouch the undercut every three weeks.
11. Highlighted Pixie Cuts for Fine Hair
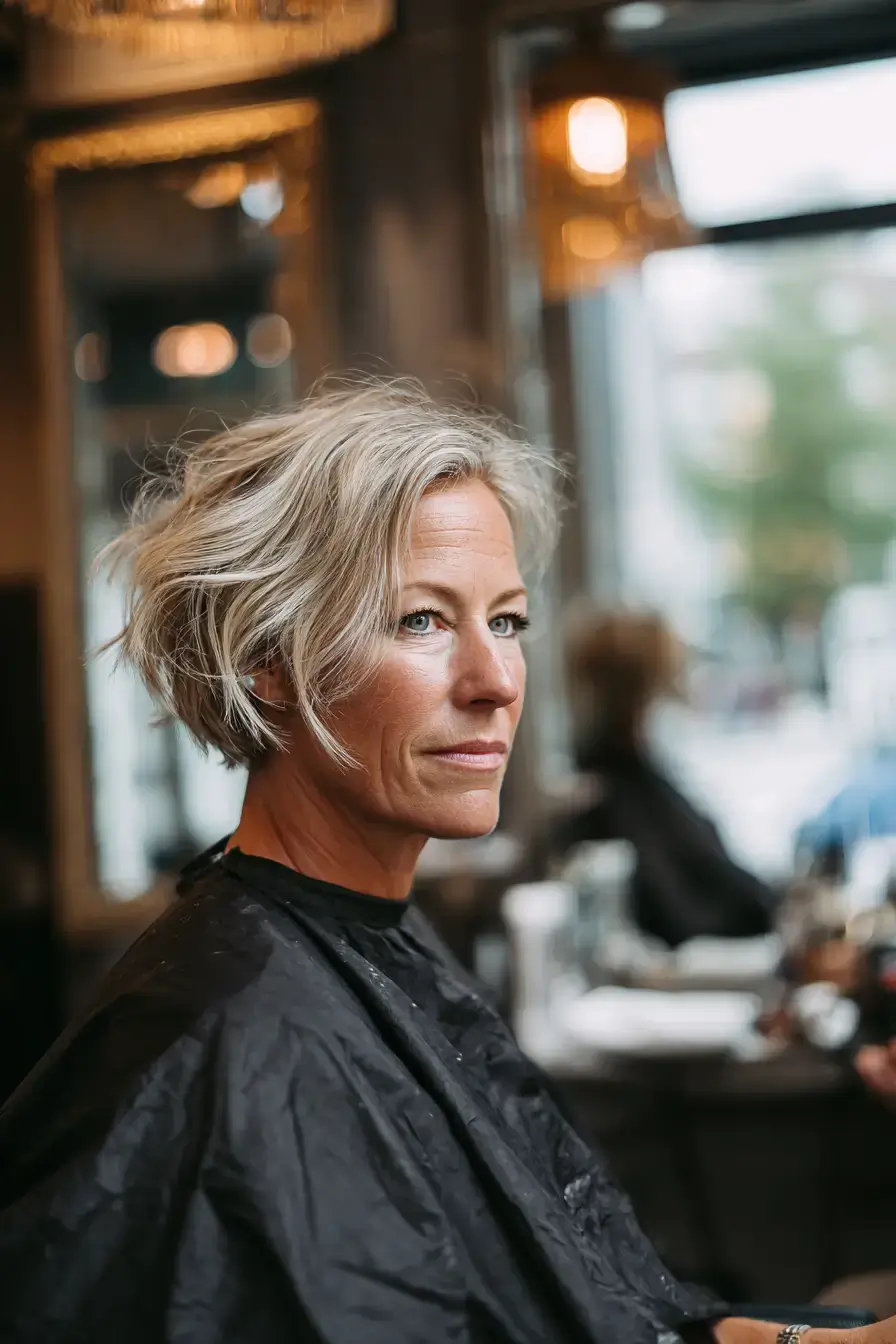
On pixie cuts for fine hair, highlights add fullness because each short layer picks up a different tone. I cut the ear-length perimeter on dry hair, point cut the crown, then foil fine level nine highlights through the top section. Fine density and most skin tones suit it. Rough-dry using a root lifting mousse and a light paste. Trim every five weeks and refresh the highlights every twelve.
12. Curtain-Fringe Pixie Bob
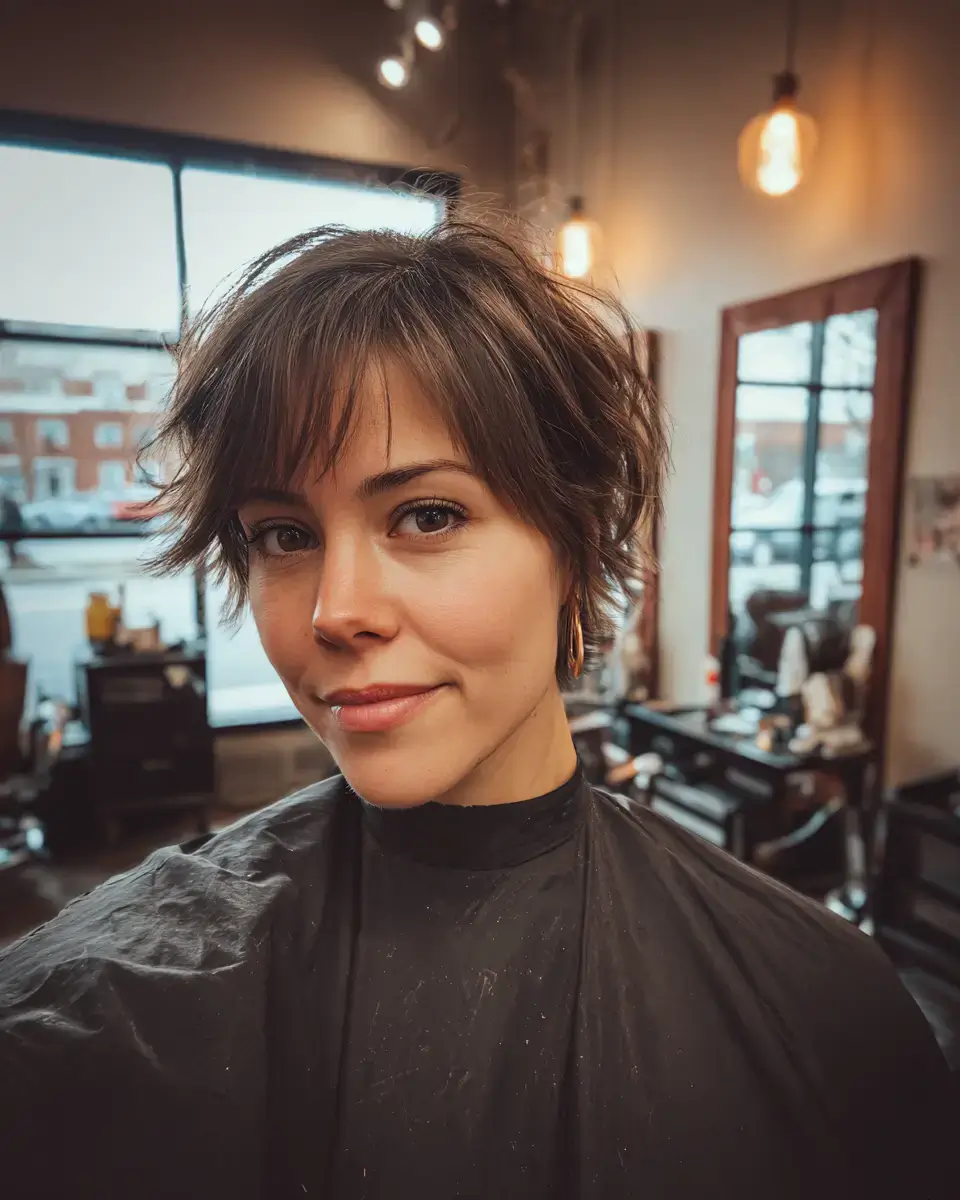
On a pixie bob, a curtain fringe parts in the center and sweeps out to the cheekbone. I cut the ear-length perimeter on dry hair, point cut the crown, then split the fringe at the center and cut it from the nose to the cheekbone. Fine density with a square or round face suits it. Use a round brush to blow the fringe out. Trim the fringe every five weeks.
13. Pixie Bob With Lift at the Root
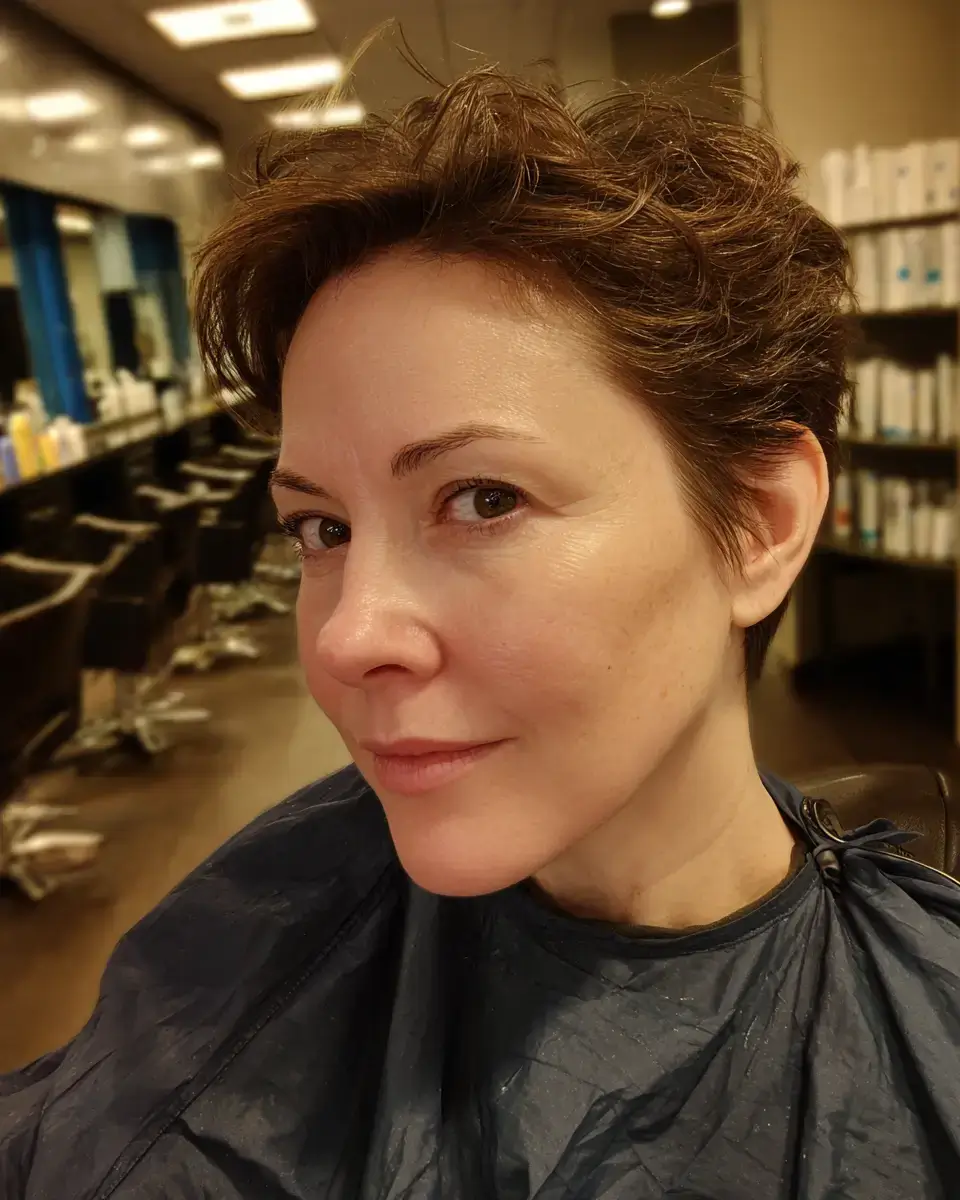
On a pixie bob, root lift depends on where I put the shortest layer. I cut the ear-length perimeter on dry hair, point cut the shortest crown layer two inches off the scalp, then texturize. Fine density with a round or square face suits it. Use a root lifting mousse and blow-dry upside down, then smooth the front. Trim every five weeks.
14. The Tapered Pixie Bob
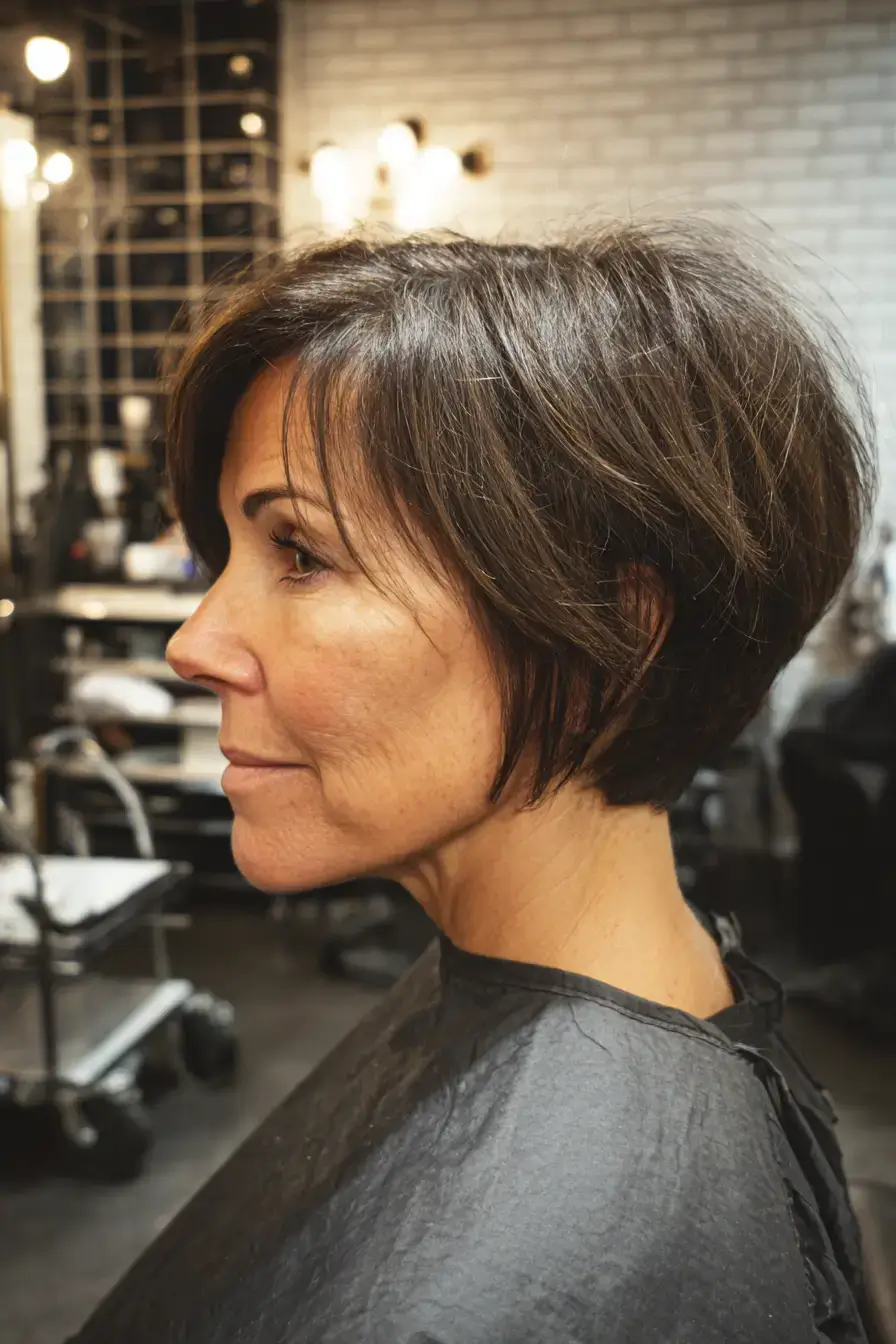
With a tapered pixie bob, the nape stays tight and the top stays soft. On dry hair I taper the nape scissor over comb, cut the perimeter at the ear, then point cut the crown to three inches. It suits fine density and oval or heart faces with a short neck. Push the top forward and rough-dry with a light paste. Trim every four weeks.
15. Money Piece Pixie Bob
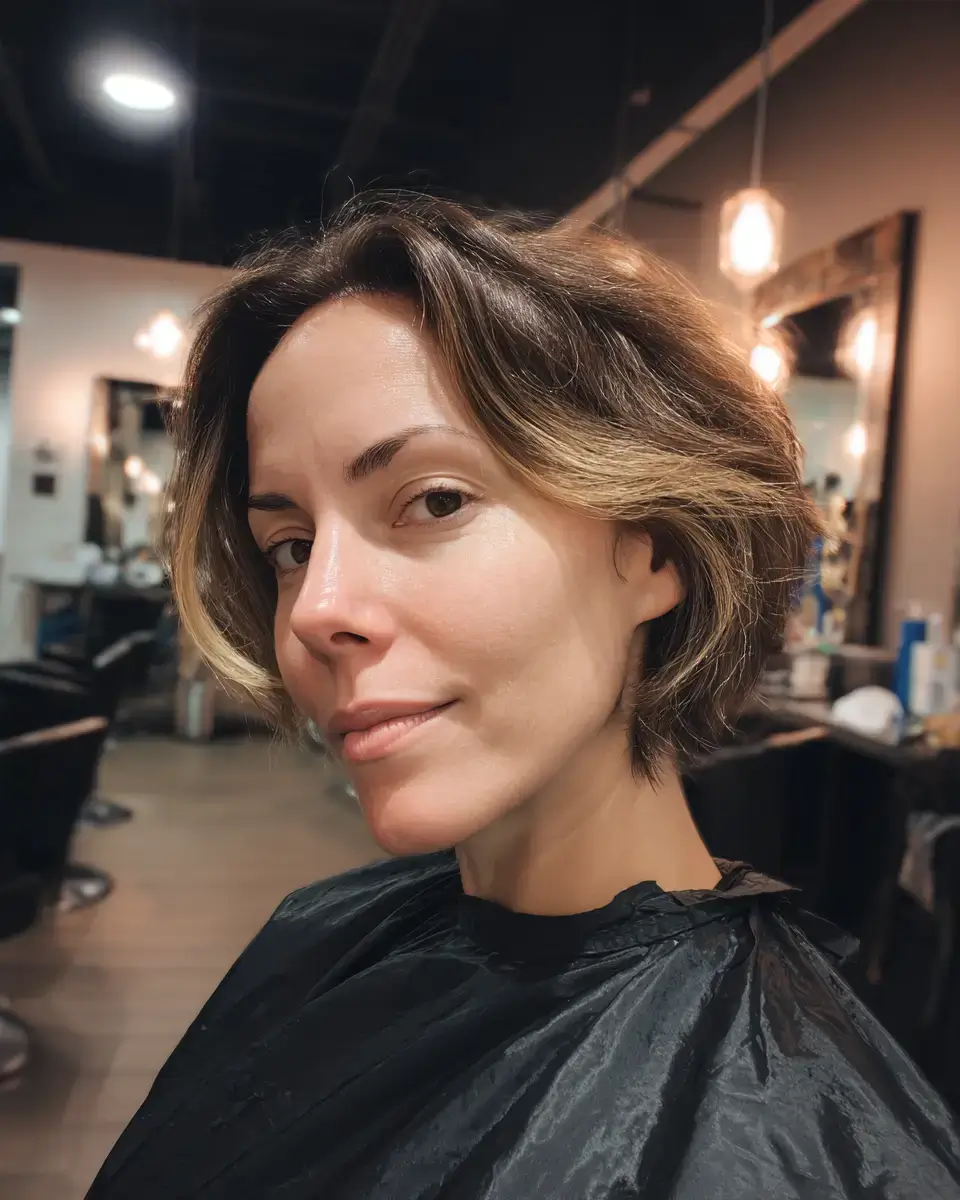
On a pixie bob, a money piece brightens the front pieces. I cut the ear-length perimeter on dry hair, point cut the crown, then lighten both front pieces root to end to a level nine and tone beige. Fine density and most skin tones suit it. Use a small brush to blow the front forward. Refresh the money piece every ten weeks and trim every five.
16. Pixie Bob Haircut for Fine Hair Over 60 With a Soft Fringe
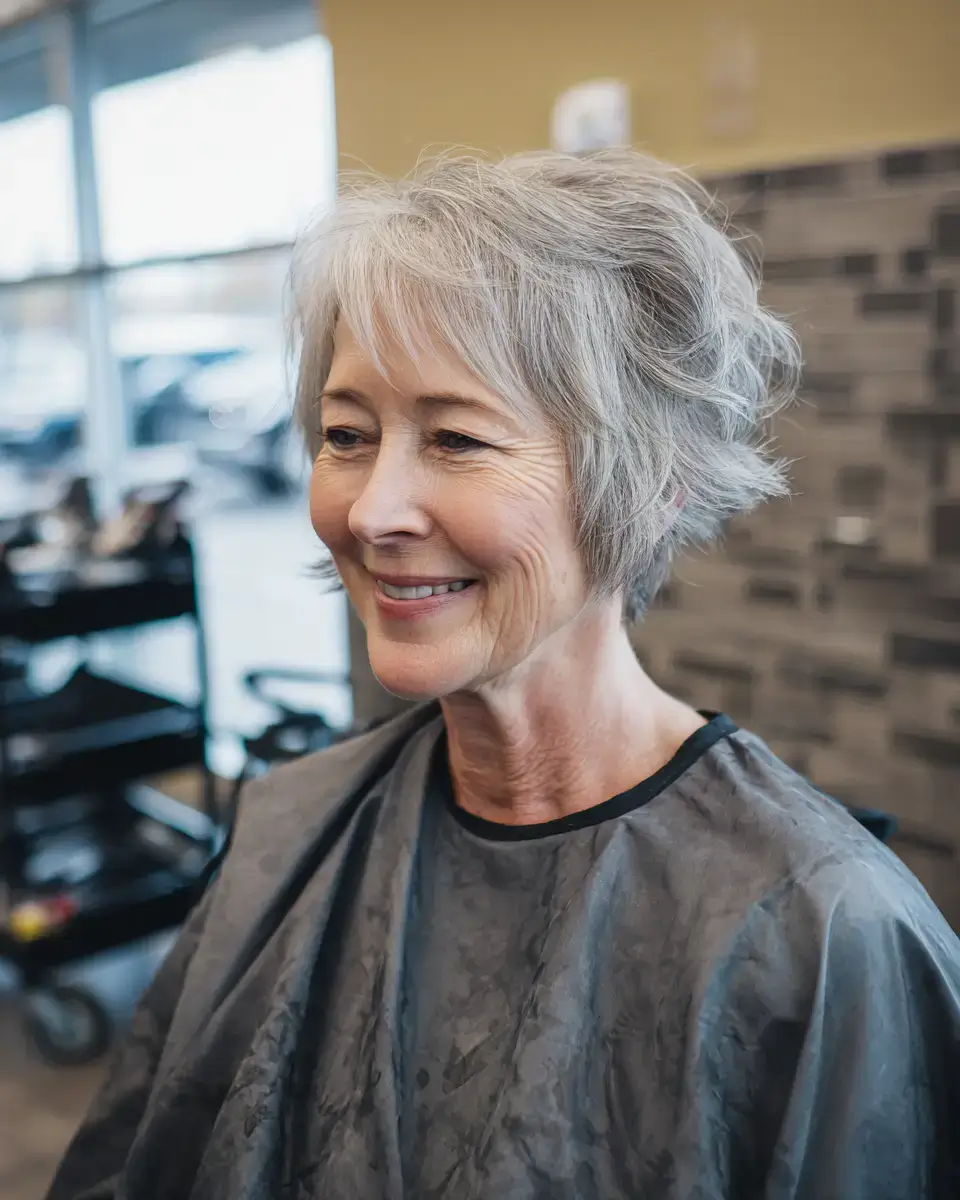
For a pixie bob haircut for fine hair over 60, I keep the layers soft and the fringe soft. On dry hair I cut the ear-length perimeter with point cut ends, point cut the crown, then cut the fringe at the brow with point cut ends. Fine density and most face shapes suit it. Use a root lifting mousse and roll a round brush back as you blow-dry. Trim every five weeks.
17. Babylight Pixie Bob
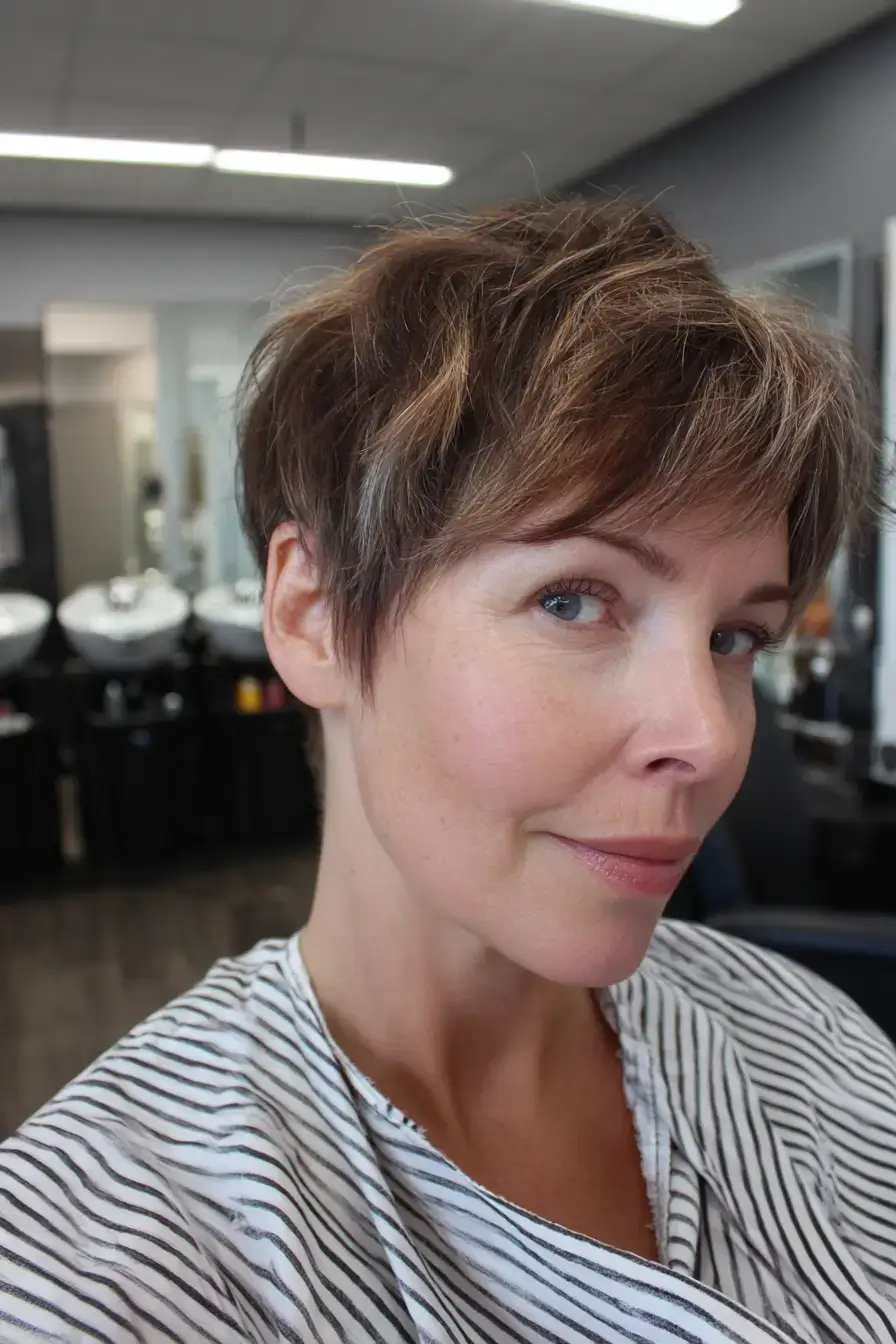
On a pixie bob, babylights are fine enough that the grow-out never shows. I cut the ear-length perimeter on dry hair, point cut the crown, then foil level nine babylights through the top. Fine density and most skin tones wear it well. Rough-dry using a light paste and finish with a light serum. Trim every five weeks and refresh the babylights every twelve.
18. Side-Parted Pixie Bob

A deep side part on a pixie bob pushes the crown layers over to one side. On dry hair I cut the perimeter at the ear, set a deep side part, point cut the crown, and leave the heavy side slightly longer. Fine density with a round or square face suits it. Use a volumizing spray and a flat brush to blow-dry the heavy side across. Trim every five weeks.
19. Pixie Bob for Glasses Wearers
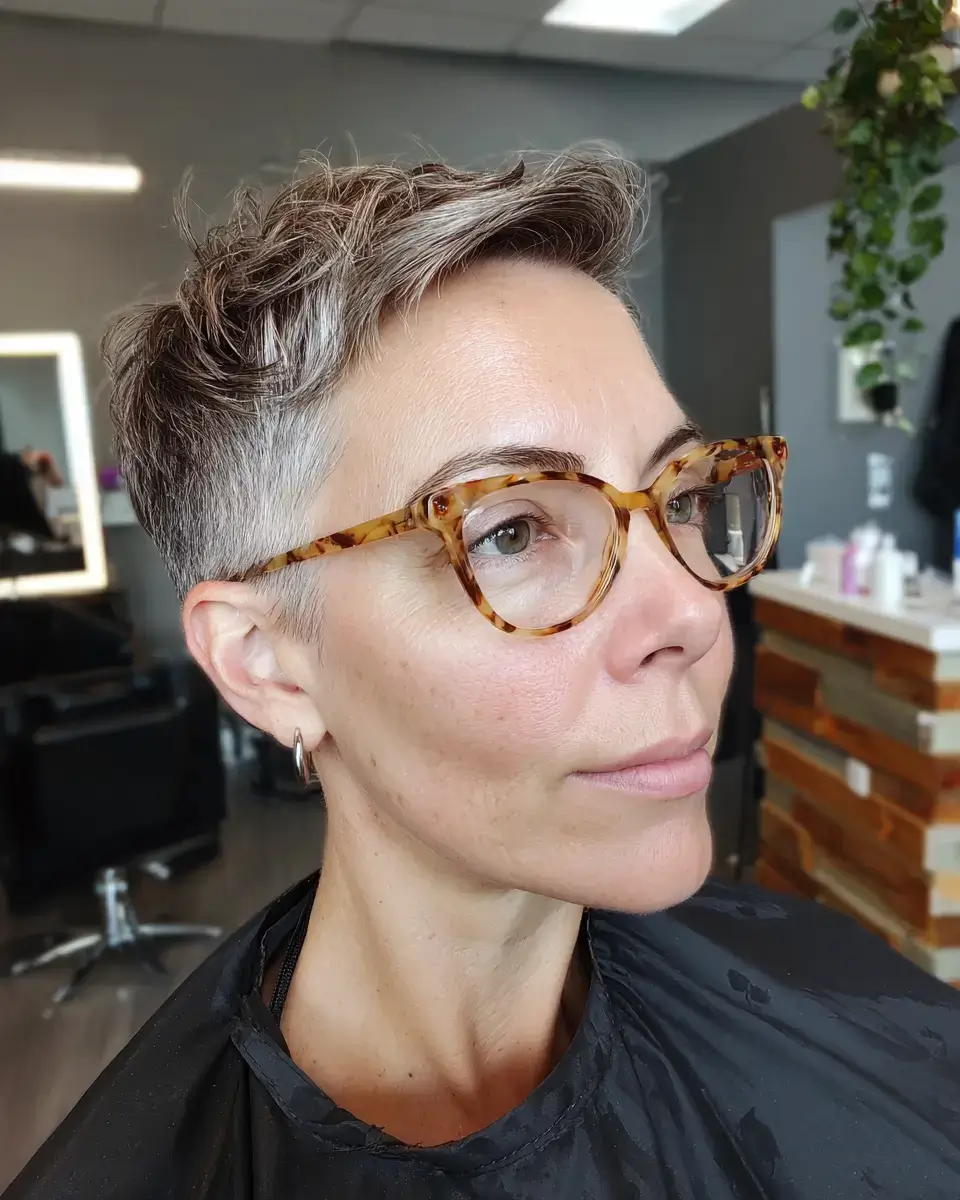
If you wear glasses, a pixie bob should keep the sides above the arms of the frames. On dry hair I cut the sides scissor over comb so they sit above the arms, point cut the crown to three inches, and leave the fringe at the brow. Fine density and most face shapes suit it. Use a root lifting mousse and blow-dry upside down. Trim every four weeks.
20. Round-Face Pixie Bob
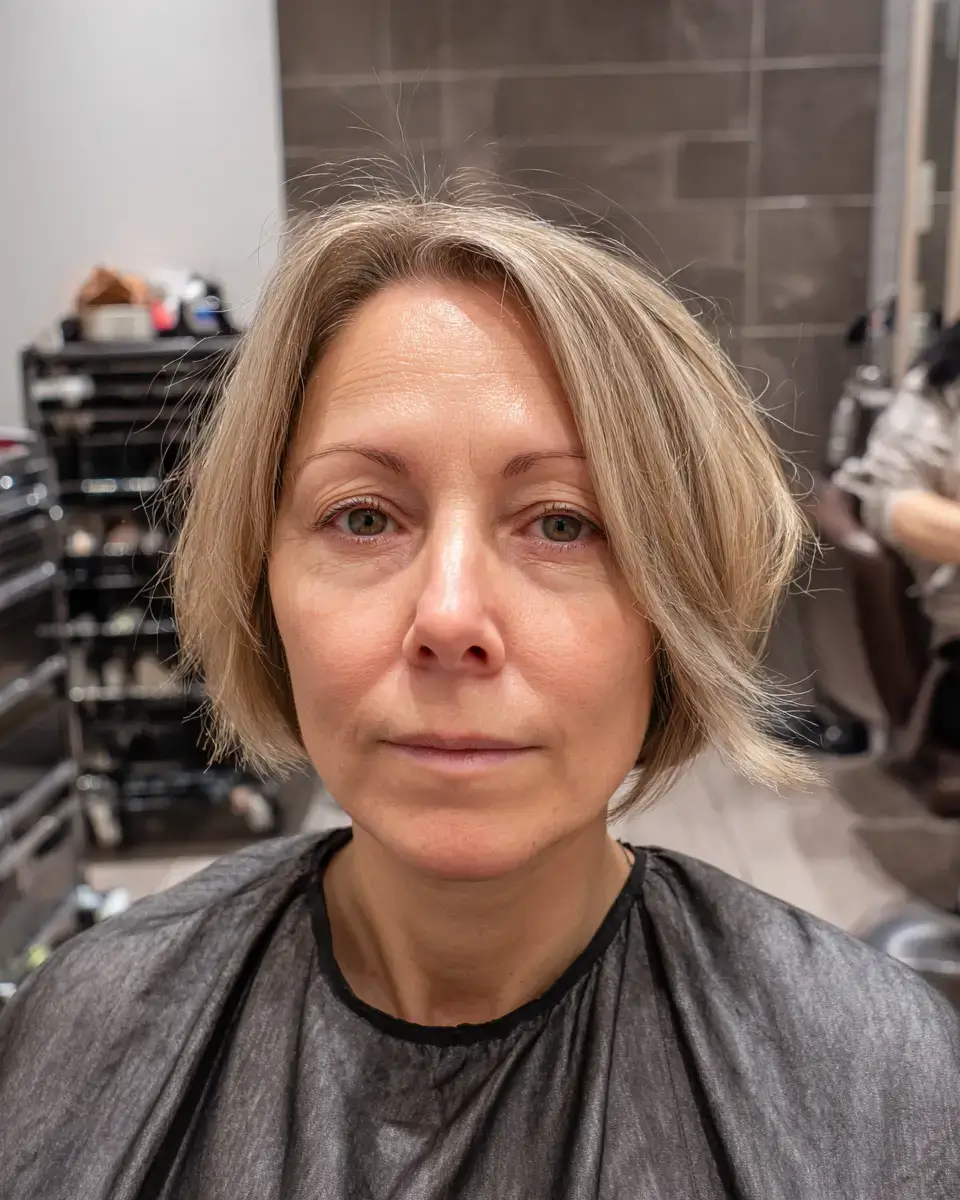
On a round face, a pixie bob needs height at the crown and length at the cheekbone. On dry hair I cut the sides scissor over comb, point cut the crown to four inches, and leave the front pieces at the cheekbone. It suits fine density and round faces. Use a round brush to blow the crown up, then dry the front forward. Trim every five weeks.
21. Balayage Pixie Bob
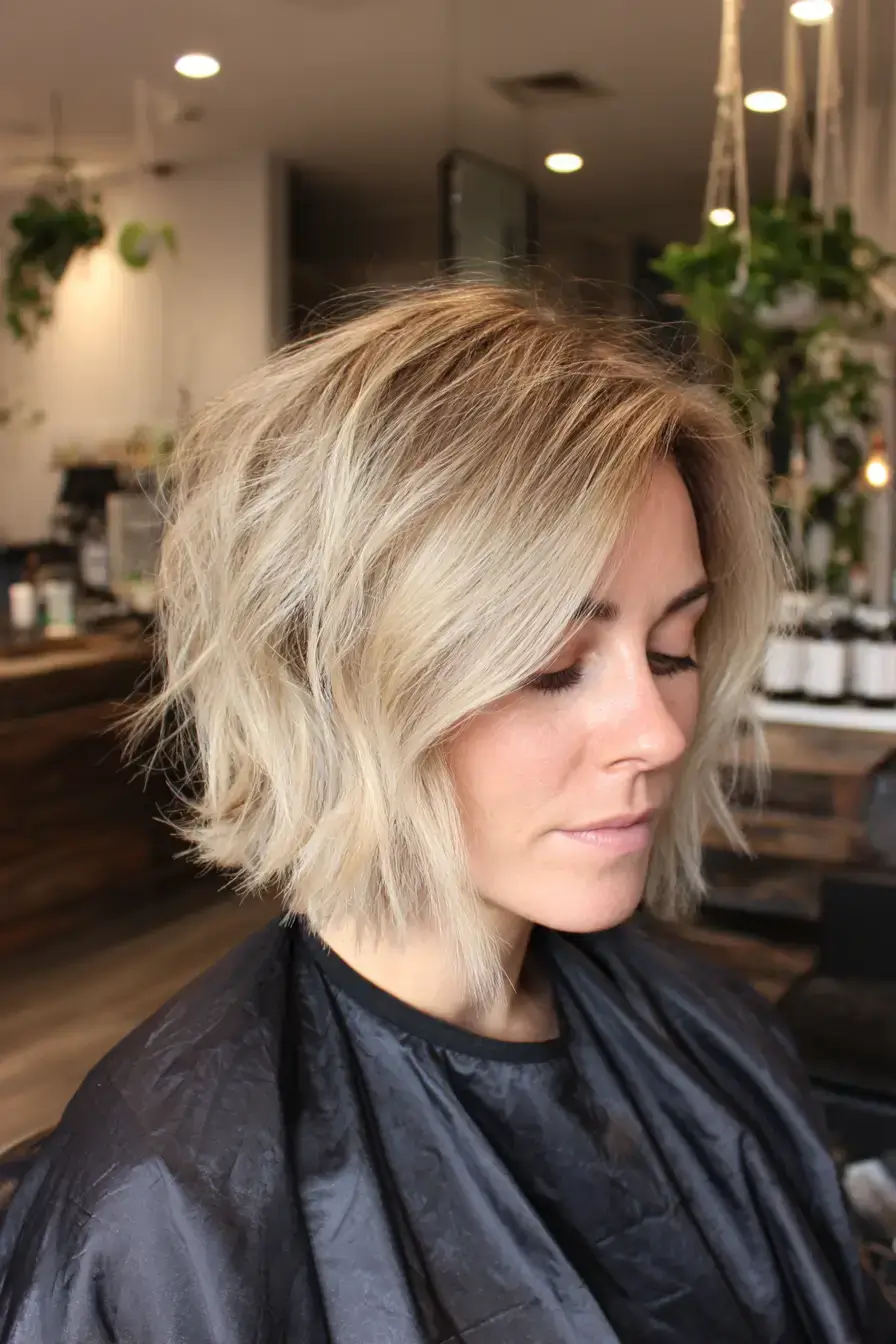
With balayage on a pixie bob, the light sits on the top layers where the eye goes. I cut the ear-length perimeter on dry hair, point cut the crown, then hand paint level nine through the top and tone beige. Fine density and neutral skin tones suit it. Rough-dry using a light paste. Trim every five weeks and refresh the balayage every twelve.
22. Air-Dried Pixie Bob
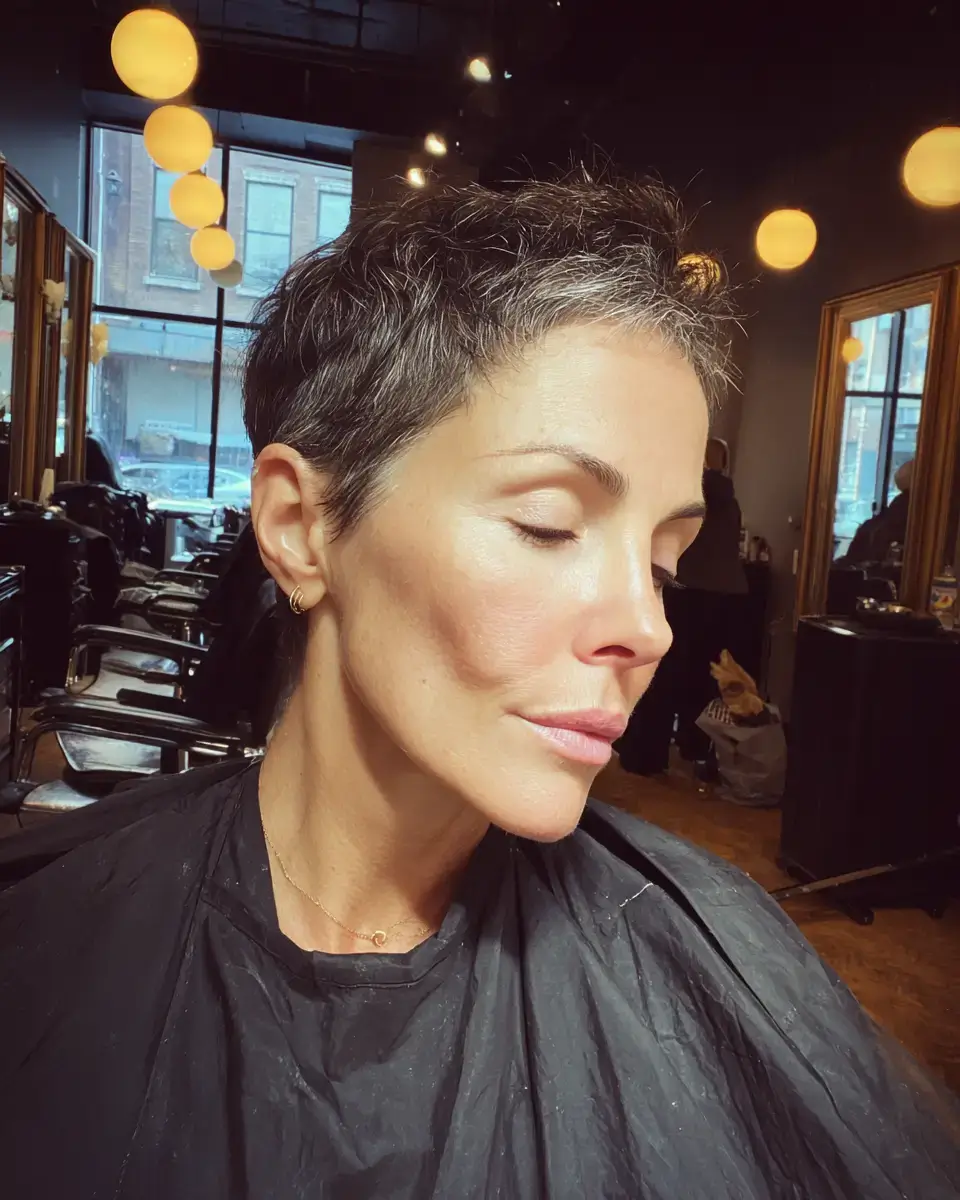
For an air dried pixie bob, I cut the layers where the hair already bends. On dry hair I cut the perimeter at the ear, point cut the crown at each natural bend, then texturize. Fine density with 1C to 2B texture wears it best. Work a light cream into damp hair, scrunch it once, and leave it alone until it dries. Trim every five weeks.
23. Lowlighted Pixie Bob
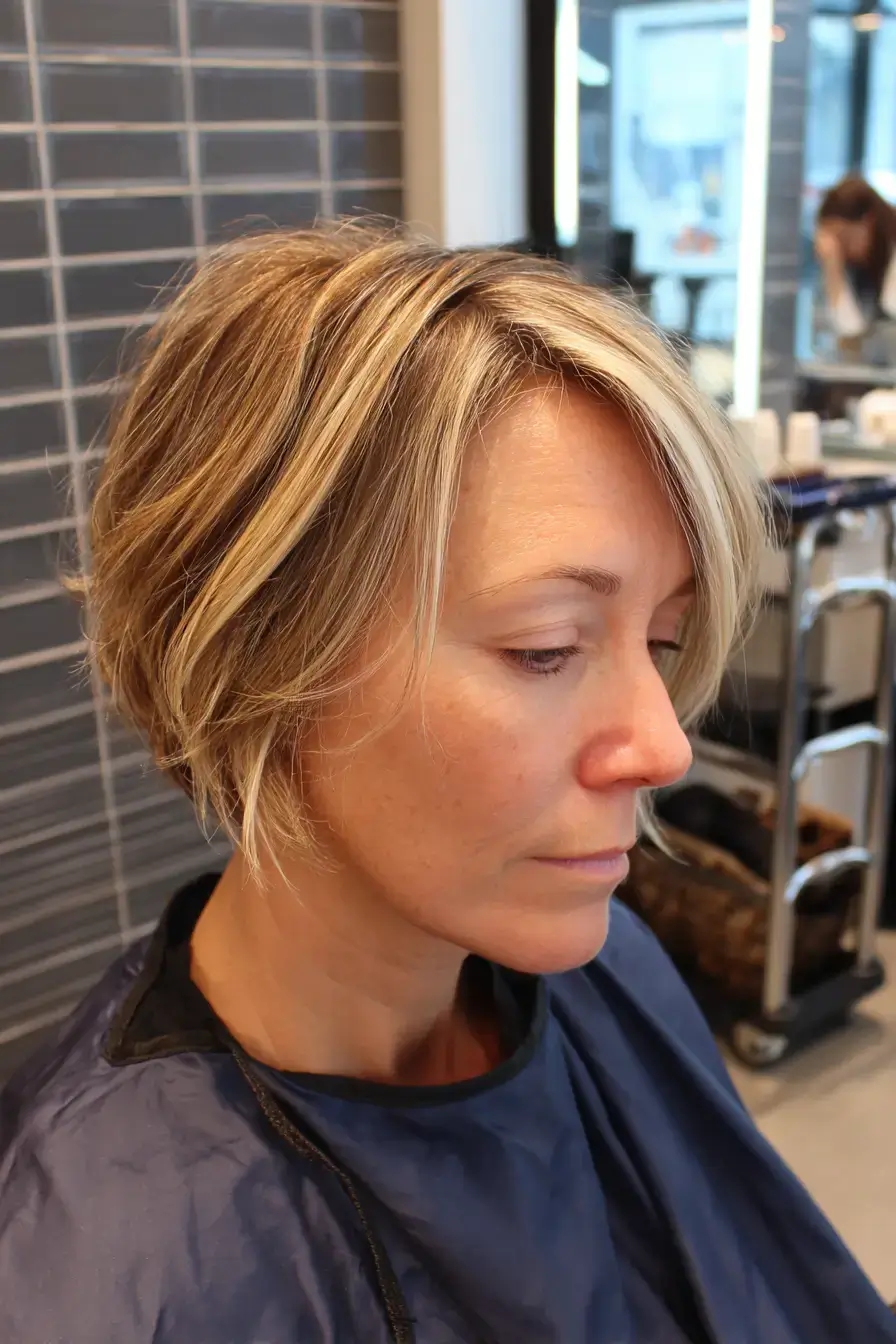
On a pixie bob, lowlights put the shadow back into fine hair beneath the layers. I cut the ear-length perimeter on dry hair, point cut the crown, weave level six lowlights through the interior, then gloss the ends. Fine density and most skin tones suit it. Rough-dry using a root lifting mousse and a light paste. Trim every five weeks and refresh the lowlights every twelve.
24. Wispy-Fringe Pixie Cuts for Fine Hair
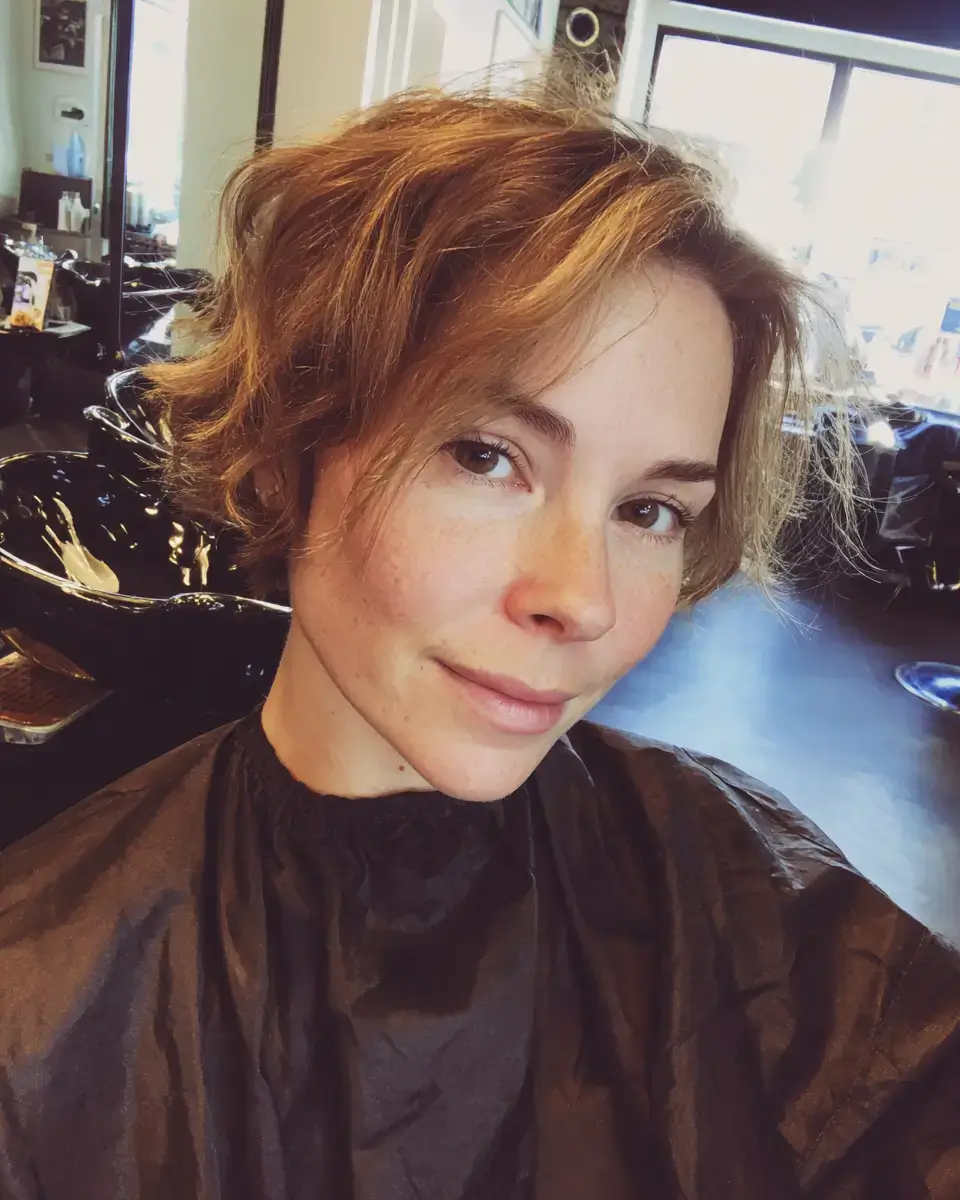
When the forehead needs cover but not weight, pixie cuts for fine hair call for a wispy fringe. On dry hair I cut the perimeter at the ear, point cut the crown, then go straight in with the shears to cut the fringe at the brow. Fine density with an oval or heart face suits it. Use a small round brush to blow-dry the fringe. Trim the fringe every four weeks.
25. The Wavy Pixie Bob
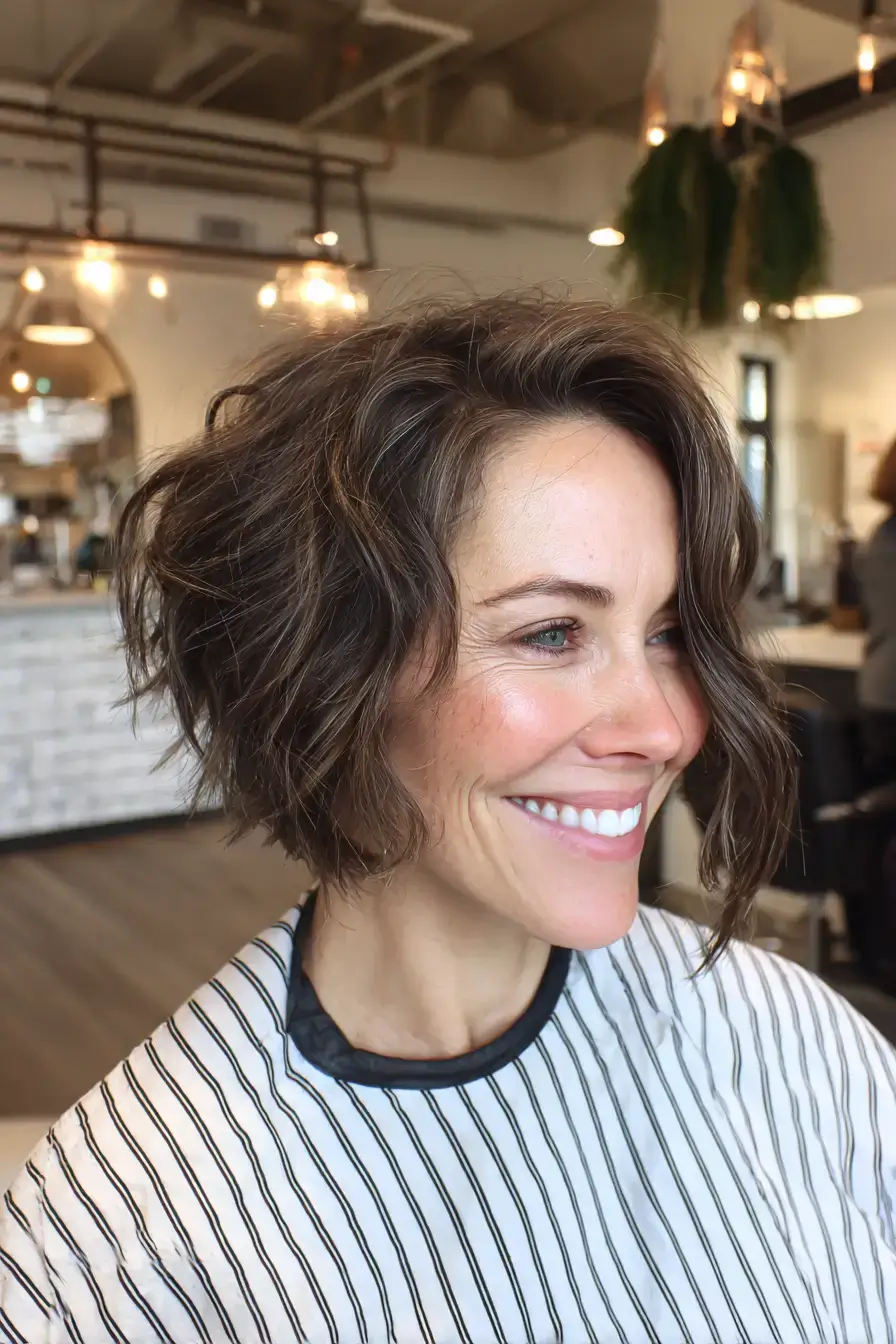
I cut a wavy pixie bob on dry hair so the wave decides each layer. The perimeter goes at the ear, the crown is point cut where the wave bends, and then I razor the ends. It works on fine density with 2A to 2C waves. Scrunch sea salt spray through the top, keep the sides flat, and let it air-dry. Trim every five weeks.
Closely related: haircuts for thinning fine hair and curtain bangs fine hair.
A pixie bob haircut for fine hair lifts at the crown because the perimeter sits at the ear, and on wavy texture the wave sets each layer. Razor the ends, scrunch sea salt spray through the top, and trim every four to five weeks.